Happy Valentine’s Day and welcome back to my “how to stencil” series during which I’m also highlighting the stencils I designed for the most recent TCW (The Crafter’s Workshop) release. Today I thought I would share a quick and easy card that you can make for someone you love. We are using TCW961: Basketweave to make the magic happen!
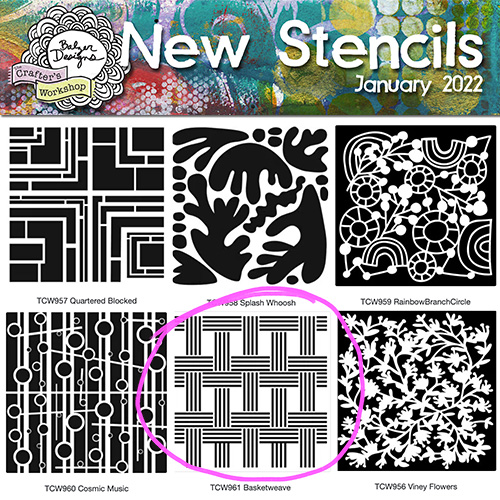
Jaime, the owner of The Crafter’s Workshop, wasn’t sure about this stencil when I submitted the design. But I’m pretty sure it’s going to be in regular rotation for me. The fact is, selfish as it may be, I really design the stencils that I want to use, so I hope you like it as much as I do!
How to Reverse Print on a Gel Plate
In this short tutorial video I’m showing you how to get a reverse print on the gelatin plate when using a stencil. Sometimes people also refer to it as “stamping with a stencil.”
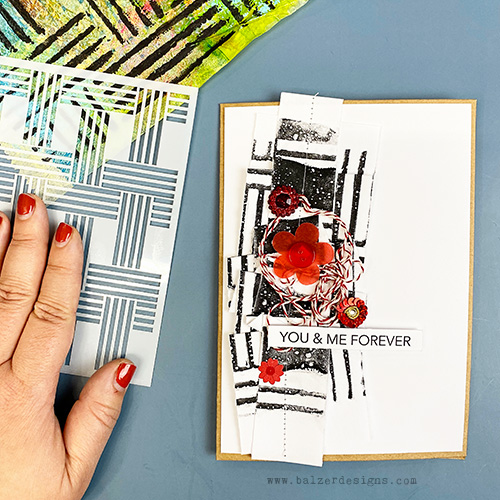
This is the card that I made in the video:
Ideas of Note
Here are some art lessons from the video that I hope you’ll make note of:
- Sometimes the part you remove is not the part you want. In this technique, the paint is removed through the stencil so the useful image is actually the paint left underneath it.
- A stencil can create a print that feels more like a stamp. Gelatin printing lets you capture the shape underneath the stencil rather than simply filling the stencil openings.
- Scrap paper can become art material. The papers used to lift excess paint pick up interesting marks and can later become collage fodder.
- You don’t need special paper. Ordinary copy paper can work beautifully for this kind of printing.
- A single stencil can generate very different-looking material. By isolating different sections of the same print, you can make papers that feel unrelated even though they share the same source.
- Cropping changes meaning. A small section of a larger pattern may read as a stripe, a line drawing, or an abstract texture rather than as a recognizable stencil design.
- Tearing can be a compositional tool. A torn edge feels softer and less rigid than a cut edge and can help a collage feel more organic.
- Paper doesn’t have to stay flat. Folding printed paper into loose pleats introduces shadow, texture, and physical dimension.
- You don’t have to measure everything. Messy, irregular pleats can create more movement and personality than perfectly even folds.
- Layering similar materials can create richness without adding more imagery. Two ruffled sections from the same print add depth while still feeling cohesive.
- Sewing is another way to draw. A stitched line can function structurally, but it also adds a visible mark and another layer of texture.
- A limited palette can make a composition feel strong. Black, white, and red is a classic high-contrast combination that lets texture and shape do a lot of the work.
- Leftover embellishments can become useful when they share a common color. Color can unify otherwise unrelated bits and pieces.
- A simple print can become much more interesting through transformation. Printing is only the first step; tearing, folding, layering, sewing, and embellishing can completely change the character of the original paper.
The larger lesson is: don’t judge a print only as a flat sheet of paper. Once you crop it, tear it, fold it, stitch it, and combine it with other elements, it can become something entirely different! Keep going until you’re satisfied.
Links
Stencil links if you wish to buy any of them:
- TCW956: Viney Flowers 12×12: https://shrsl.com/3clb8 6×6: http://shrsl.com/3clbe
- TCW957: Quartered Blocked 12×12: http://shrsl.com/3clbg 6×6: http://shrsl.com/3clbh
- TCW958: Splash Whoosh 12×12: http://shrsl.com/3clbj 6×6: http://shrsl.com/3clbm
- TCW959: Rainbow Branch Circle 12×12: http://shrsl.com/3clbq 6×6: http://shrsl.com/3clbu
- TCW960: Cosmic Music 12×12: http://shrsl.com/3clbw 6×6: http://shrsl.com/3clc2
- TCW961: Basketweave 12×12: http://shrsl.com/3clc5 6×6: http://shrsl.com/3clc9
Other posts in this how-to stencil blog series:
- Six New Stencil Designs from Balzer Designs: Unboxing Video
- How to Stencil: Stenciling with Ink Pads on the Gelatin Plate!
- How to Stencil: Some Tips on Using a Stencil Brush
- How to Stencil: Making Ghost Prints with Stencils on a Gel Plate
- How to Stencil: Stamping Through a Stencil
- How to Use Spray Ink with Stencils: Get Two Prints from One Spray
- How to Stencil: Stamping with a Stencil (this post)


I love this stencil! Will you be using it in any of your paper weaving experiments, for a double-woven effect?
I may! Thats a great idea!