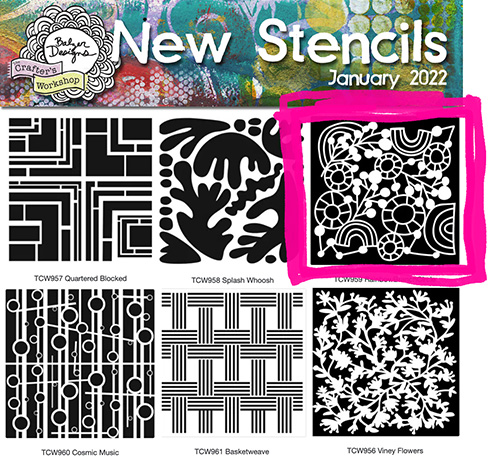
Welcome back to my “how to stencil” series during which I’m also highlighting the stencils I designed for the most recent TCW (The Crafter’s Workshop) release. Today we are playing with TCW959: Rainbow Branch Circle.
Here is a monoprint that features this stencil:
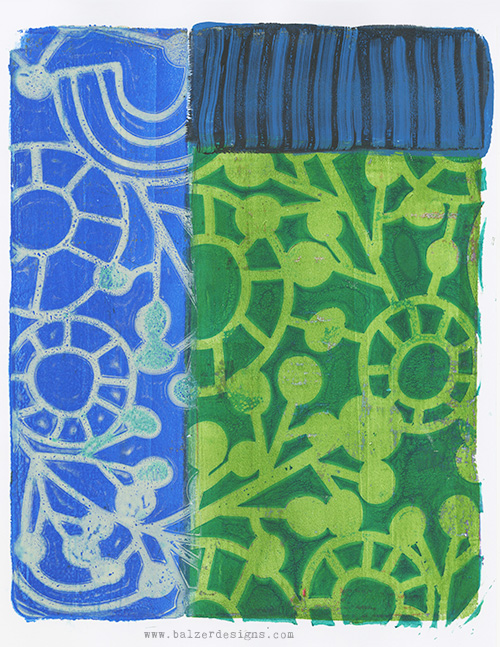
I love this design! It has so many of the shapes that I’m totally obsessed with at the moment: circles with spokes, rainbows, and branches with big dots. This is another stencil that I made for myself to use and fell in love with. It’s such a versatile design and I’m so pleased to be able to offer it to a wider audience.
The Easiest Way to Use Spray Inks with Your Stencils
In this short tutorial video I’m showing you the single easiest way to use spray inks with your stencils, get great results, and get two prints with just one application of spray ink! Sounds too good to be true, right?
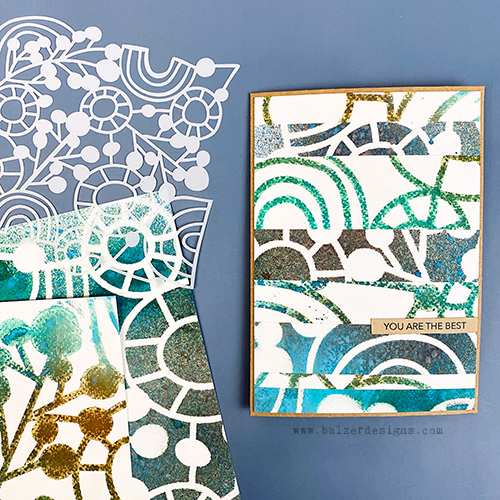
This is the card that I made in the video:
Ideas of Note:
Here are some art lessons from the video:
- Choose a dominant color family, then introduce contrast. The blues and green create harmony, while the orange adds energy and keeps the palette from feeling too predictable.
- Spray technique matters. Moving your hand while spraying and working several inches away helps create more even coverage and cleaner stencil shapes.
- White space is an active part of the composition. The untouched paper showing through the stencil gives the sprayed color room to breathe.
- Don’t clean the stencil too quickly. The ink left on the surface can become a second print.
- One application can produce two very different images. The original sprayed stencil print and the transferred print from the wet stencil create positive/negative counterparts.
- A stencil can function like a stamp. Pressing or brayering the ink-covered stencil onto another sheet turns the stencil itself into a printing surface.
- Pressure is more important than special equipment. A brayer makes transferring the ink easy, but your hands can accomplish the same basic job.
- Look for the second opportunity in your materials. Residual ink, paint, scraps, and offcuts can often become useful artwork rather than waste.
- Related prints make excellent collage material. Because both papers came from the same stencil and palette, they naturally coordinate even though they have very different values.
- Cutting a print apart changes how you see it. Once the images become strips, you stop reading them as a single stencil design and start seeing line, shape, color, and rhythm.
- Avoid simply reconstructing what you started with. Shifting, reversing, and rotating the strips prevents the original stencil pattern from reappearing and creates a genuinely new composition.
- Alternating light and dark creates rhythm. Value contrast can organize a composition just as effectively as color or pattern.
- Recombination is a powerful creative strategy. Make something, break it apart, rearrange it, and see what new relationships emerge.
- Simple processes can produce sophisticated results. The complexity comes from thoughtful choices about color, value, repetition, direction, and placement rather than from a complicated technique.
To sum up: Don’t think of the first print as the final result. A print can be transferred, cut apart, rotated, recombined, and transformed into something that no longer looks like the original stencil at all.
Links
Stencil links if you wish to buy any of them:
- TCW956: Viney Flowers 12×12: https://shrsl.com/3clb8 6×6: http://shrsl.com/3clbe
- TCW957: Quartered Blocked 12×12: http://shrsl.com/3clbg 6×6: http://shrsl.com/3clbh
- TCW958: Splash Whoosh 12×12: http://shrsl.com/3clbj 6×6: http://shrsl.com/3clbm
- TCW959: Rainbow Branch Circle 12×12: http://shrsl.com/3clbq 6×6: http://shrsl.com/3clbu
- TCW960: Cosmic Music 12×12: http://shrsl.com/3clbw 6×6: http://shrsl.com/3clc2
- TCW961: Basketweave 12×12: http://shrsl.com/3clc5 6×6: http://shrsl.com/3clc9
Other posts in this how-to stencil blog series:
- Six New Stencil Designs from Balzer Designs: Unboxing Video
- How to Stencil: Stenciling with Ink Pads on the Gelatin Plate!
- How to Stencil: Some Tips on Using a Stencil Brush
- How to Stencil: Making Ghost Prints with Stencils on a Gel Plate
- How to Stencil: Stamping Through a Stencil
- How to Use Spray Ink with Stencils: Get Two Prints from One Spray (this post)
- How to Stencil: Stamping with a Stencil


Fantastic! I’ll try that when my stencils arrive!
Love this stencil! Waiting for it to come in the mail!
Have fun!
Yay!
Fantastic. x
Love it!!
I wish my sprays wouldn’t clog up. It’s mostly the acrylic sprays, I think.
Yes! And anything with mica in it.
I am way behind on my card-making. Using this technique would help me to catch up on the approximately one billion cards I need to make! And I love that Rainbow Branch stencil!
Yasss! Do it and have fun!