You guys, it’s not too late to make holiday cards to send out to friends and family! Especially when everyone is housebound, I think mailing a little handmade something sounds extra lovely. Therefore, every day this week I’m going to be sharing a tutorial for easy artsy holiday cards you can make and mail! Here we go!
Make Collage Cards From Your Scraps
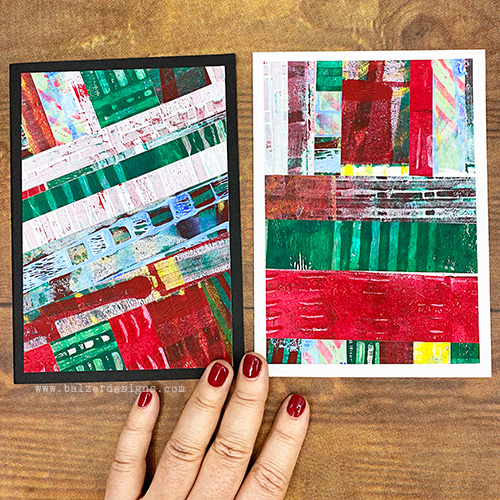
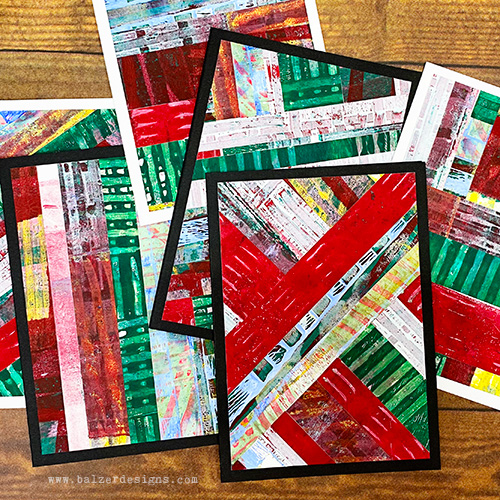
Today’s cards are a great way to use up all of the hand painted paper scraps you have sitting around. I used gelatin prints, but you could use any painted/printed/doodled paper bits.
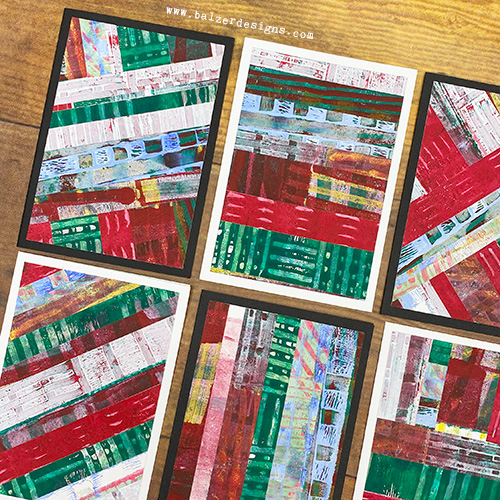
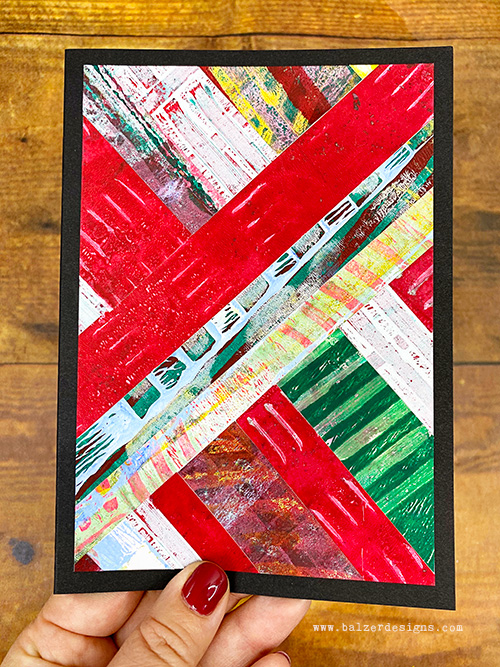
Step-by-Step Video Tutorial
Watch the video for the how-to:
Supplies:
- paper scraps
- tape runner
- scrap cardstock for the base
- optional: scissors
- paper trimmer
- blank card
If you want to make lots and lots of gelatin printed papers, my online class, “A Year of Gelatin Printing,” is awesome.
Lessons to Note
Here are some take aways from the video for artists and makers that go beyond the tutorial:
- Simple materials can create sophisticated results. The gelatin prints don’t have to be special on their own. Cutting and recombining them changes how they read.
- Straight edges create unity. When the strips butt cleanly against one another, lots of unrelated colors and patterns suddenly feel intentional and almost woven.
- Composition can come from arrangement rather than imagery. Horizontal, vertical, diagonal, radiating, or mixed directions all create different visual energy using exactly the same papers.
- You don’t have to overthink color matching. Even mismatched prints can become visually cohesive once they’re organized into a strong structure.
- Cropping is part of the design process. Trimming the finished collage lets you decide which areas are most interesting and removes distracting edges.
- Save the offcuts. The strips you trim away can become useful design elements in another card or collage.
- Work from one reliable straight edge. Establishing that first clean cut makes all the later measuring and trimming easier.
- Check your craftsmanship at the end. Small lifted edges can undermine an otherwise polished piece, so tack down anything that didn’t fully adhere.
- The background changes the artwork. Mounting the same kind of collage on white versus black cardstock gives it a noticeably different character.
- You can stop before adding more. A greeting or embellishment is optional. Sometimes the abstract paper composition is enough.
- Repetition creates variation. Making several pieces with the same basic process is a great way to explore composition without having to invent an entirely new project each time.
- Constraints can make improvisation easier. Straight strips, one rectangular base, and a limited set of placement choices provide enough structure that you can work intuitively without planning every decision.
In Closing
I hope you enjoyed this tutorial. I think this technique would be also be fun for creating a journal cover! That’s next on my things-to-try-list!
Thanks for stopping by!
Check out the rest of the tutorials in this series:
- How to Make Collage Cards from Gelatin Print Paper Scraps (this post)
- Stamped Christmas Tree Cards with Hand Carved Stamps
- Gelatin Printed Snowflake Cards: An Easy Holiday Card Tutorial
- Simple Mixed Media Tutorial Using Existing Supplies
- Masked and Stenciled Cards: An Easy Layered Stencil Technique
PS: I used this technique with wrapping paper to make thank you cards!

Many thanks! I’d love to try this.
Julie, What a great idea! I am going to do try this with all of my fabric stash. Thanks for the inspiration today.
Love it, thanks, a lot!! I needed some new ideas this year!!
Thanks Julie – love the results! Have tons of bits and pieces that I can use.
These are so gorgeous! What a fantastic idea with endless possibilities!! Thank you so much, Julie!
You’re always so inspiring! I started a 100 day Mail Art project in April. I still have about 40 more to send. Plus, I had a dream that I was taking an in person class! When asked, I told the teacher I have so many pieces of paper that I do not know what to do with. Well, now I know. Thanks for the spark.
wow how did you know that i collect watercolor scraps…i have boxes of them…amd i use them for card making,,,lol…i also use them for making collage pieces…i also collect fabric and fabric scraps…they could also be used to make cards…u could stiffen them up with Stiffy ( my bottle is quite old…don’t know if they still make it…Toni Thompson
Julie, you’ve inspired me once again! I made some cards out of strips and one from some leaves I punched. https://www.instagram.com/p/CHtl4ECHTaJ7OKlxGSoHDPJLPepzHpQHLwUvz80/?igshid=1a94sqskh6mj4
Julie, This post inspired me to make them with my fabric scraps. I’ve tried making these before, but never liked them until I saw yours made of paper. I posted a tutorial mentioning you and your post, on my blog today. Thanks again for the inspiration. Here is the link: https://lyndaheines.blog/2020/11/27/how-to-scrap-greeting-cards/
Lynda, love your fabric cards, too. Thanks for the tip of converting a photo to B&W, too!
Julie, this was just the inspiration I needed today!
I made cards and I took it one step sideways and glued my pieces
to a label (substrate) and then replaced it on its cardboard can for
storing pens, etc.
Thanks!