
You can buy craft storage boxes. There are lots of pretty plastic and metal ones to choose from. But, you’re crafty! So, why not make your own for little to no cost! (I like FREE, don’t you?)
How I Turn Boxes That Were Mailed to Me into Craft Storage
I love getting mail. Not just because of what’s in the boxes, but because I love getting the actual boxes! Every box that comes into this house becomes a storage unit. I have three general ways of cutting boxes into storage containers.
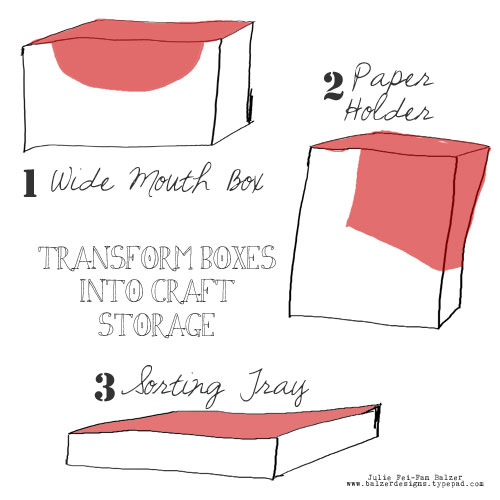
The red part is the part of the box that I like to cut away. Let me show you what they look like in real life.
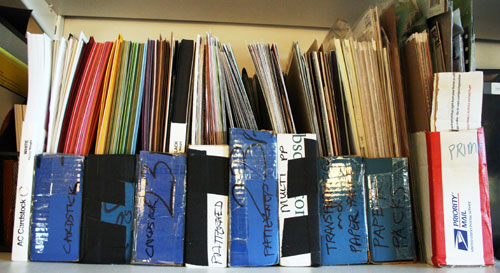
The Wide Mouth Storage Box
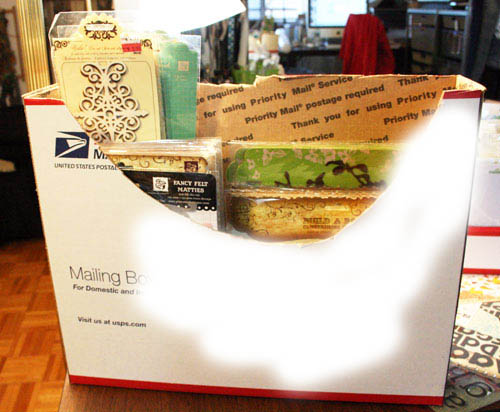
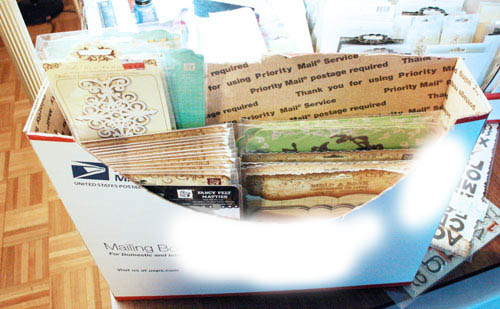
I like to use the wide mouth boxes for things like mini albums, felties, letter stickets, etc. You can put the box on a shelf and it doesn’t take up much room. I write what’s in the box on the spine and then when I want to craft, I simply pull down the boxes I want and go to town!
(I know that a USPS box isn’t the most beautiful thing. You can certainly paint it or cover it with paper for a prettier look.)
Note the part of the photo that has a kind of weird white glow on it is where I digitally covered up my mailing address. After all, these are boxes that were sent to me!
Paper Sorters: Storage for 12×12 Paper
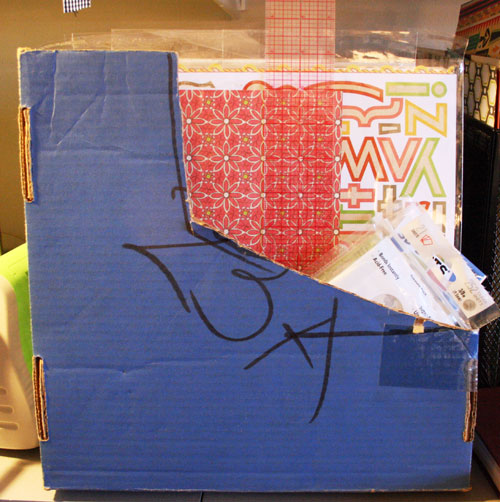
(Can you tell that I used to subscribe to a kit club that sent out big blue boxes?) Paper sorters are so necessary and it’s easy to transform boxes into paper storage! You can see how I’ve written what’s in each box on the edge. Not pretty, but it’s functional. (Can you also tell that I used to live in apartment 23A?)
When I go to a crop I put all of my papers into one of these paper sorters. They travel well and then when I arrive at the crop I can simply pull out the box of papers and it’s easy to sort through. The left image is of my traveling paper sorter and you can see that I also have a ruler and some glue dots stuffed into it.
ETA: This post was originally published in 2010. It’s 2026 now (16 years later!) and I still use these paper sorters in my art studio!
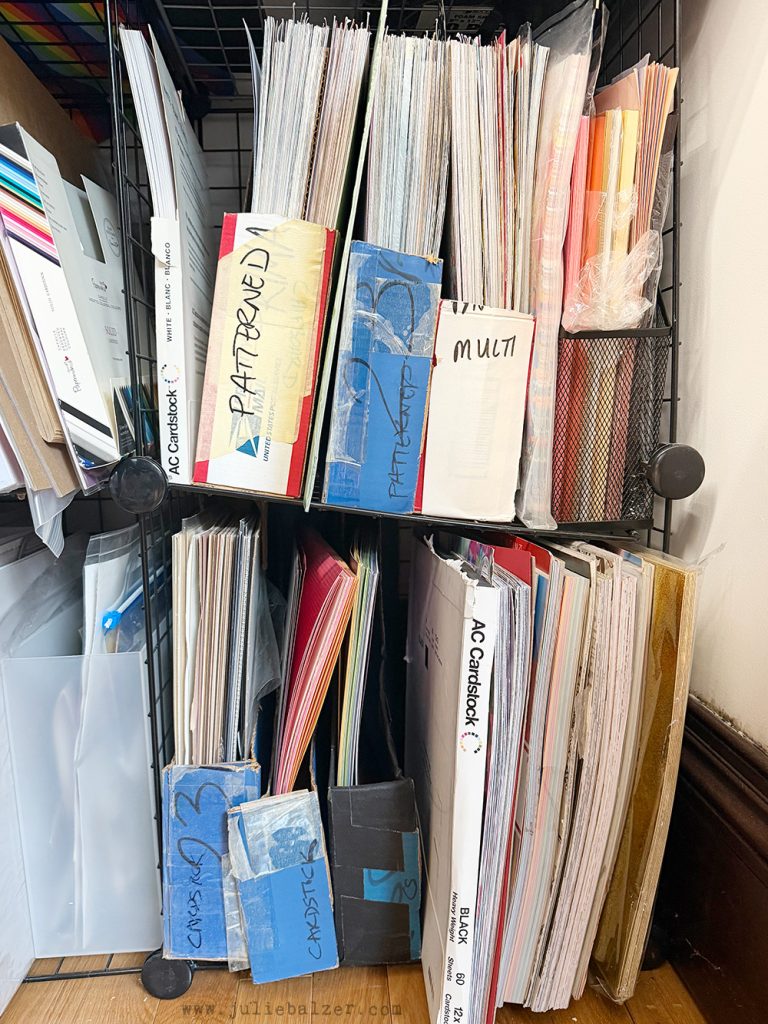
(And I learned from this photo that my shelves are falling apart and I need to fix them!)
Sorting Tray = Craft Supply Storage
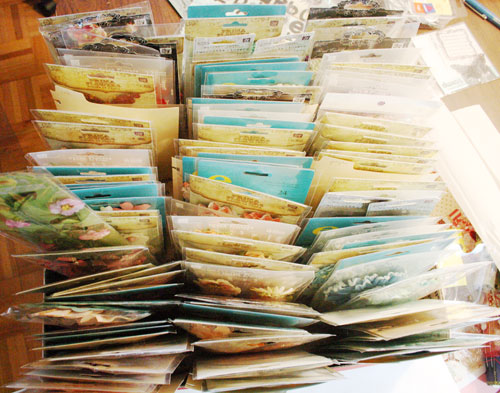

The sorting tray is my most recent discovery/invention. You can see the top and front views above. I received a huge shipment of Prima flowers and wanted to arrange them in a way that I would be sure to see them all in order to maximize my creativity with them. I sorted the flowers by color and then stuck them into the box. I put dividers at the front of each color, so it’s easy to find what I want. I love how easy it is to see what I want and grab it.
Tips for Making Your Own Storage Containers
A couple of tips if you want to try this:
- You need serious scissors to make it through the boxes and not get frustrated. I have also had good luck with a box cutter (which is, I guess, why they call it that).
- Only use USPS boxes that you receive in the mail.
- Plan your cutting to eliminate the parts of the box that are most damaged or worn through their travels in the mail (dented corners, etc.)
- If anything feels wobbly, use tape (duct, packing, whatever) to secure the boxes and make them sturdier.
I hope you’ll make yourself some amazing storage containers!
Thanks for stopping by!

you ROCK!!! great idea with the storage boxes!! thanks so much for sharing – I have a TON of boxes right now – after the holidays 🙂
Crafty storage ideas for sure Julie! I hope you have a great time at CHA and I know that you’ll find unique ways to use the new products.
wow..i NEVER thought of using boxes like you use them! LOL! awesome!!!!!!! have fun at CHA!
Whoa! What wonderful ideas you have!!! This is really a practical way to organize. Thanks!
I’m absolutely going to make myself another “cropper hopper” when I get home. Thanks for the idea!
way to recycle !~ i’ll have to start saving my boxes.
Great storage tips, Julie! Have fun at CHA. Sure wish I was going!
This was a fantastic idea! Thanks for sharing….I definitely will have to do this in my scrap room!
I don’t know what’s more amazing..your storage idea or all the Prima’s that you have!
Have fun at CHA. Will you post photos of all the new great products? I loved following your blog during the last CHA.
Great idea and holy crap! That’s a lot of flowers. I’m totally jealous :o(
this was one of my favorite things about your studio! you are so resourceful.
You never fail to surprise me! What a great, crafty storage idea. I always throw boxes away, but now I’m going to think before I toss them.
Julie, I am thrilled that you’re coming out to beautiful Southern California. I would LOVE to meet you! I’ve been following your blog since early December, after discovering you on Scrapbook Memories TV. You have me totally hooked on scrapbooking — even though I don’t know what I’m doing.
To refresh your memory, I’m the English high school teacher who, after watching you on TV, assigned a winter journal/scrapbooking homework activity to my students (200 teenagers). Their projects were amazing, and they LOVED the assignment. Some of my students are still begging for another scrapbook homework project!
It seems that CHA is only allowing the general public to show up this coming Friday and Saturday. I will be going on Saturday. Will you be around this Saturday? I sure hope so! I will have my camera ready, as I would love to take a picture with you.
Julie!
As a woman who works in a box factory for a living, great ideas! :))
As always, thanks for the inspiration.
I love this way of reusing boxes! I have the same system for my scrappy and crafty stuff as you 😉
Why go and buy when you can make it easy like that with what you have!
Love this :o)
Hope you have a lovely day!!!
Pingback: Art Supply Organization Week: Storage Containers - Balzer Designs Blog
Pingback: Art Studio Tour: Part Two - Balzer Designs Blog