
Today’s post is all about painting metal because of these simple $1 tin Christmas buckets.
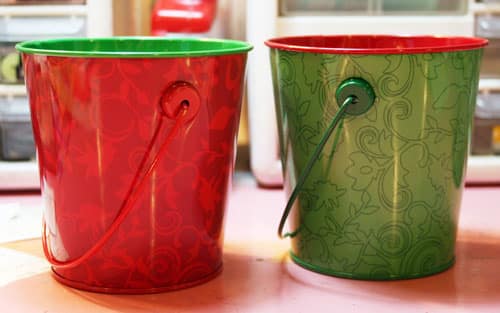
My brother’s apartment is (fortunately or unfortunately) about a block from the Michaels in Manhattan. You can’t visit him and not go to Michaels right? On a recent trip to visit him, I bought the buckets above and splashed paint all over them once I got home!
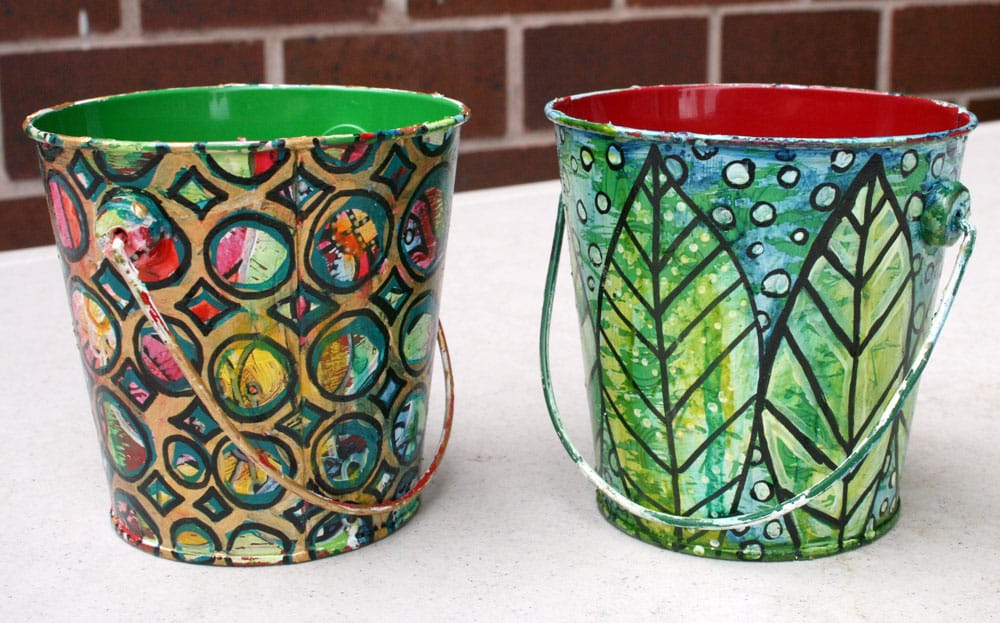
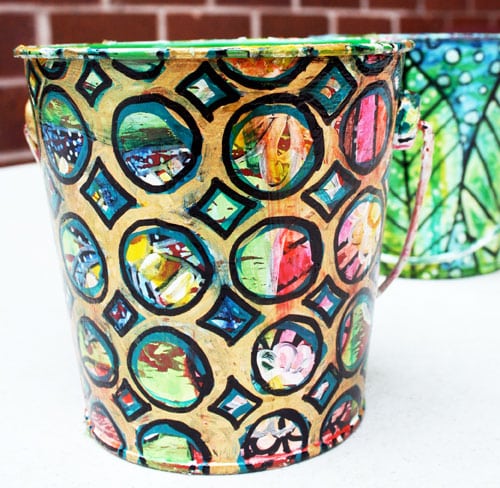
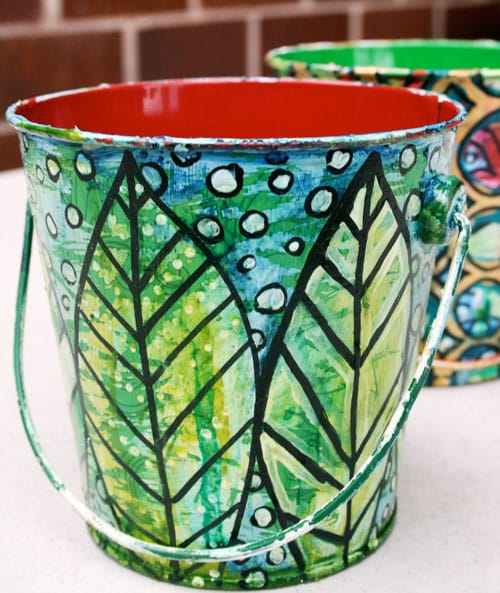
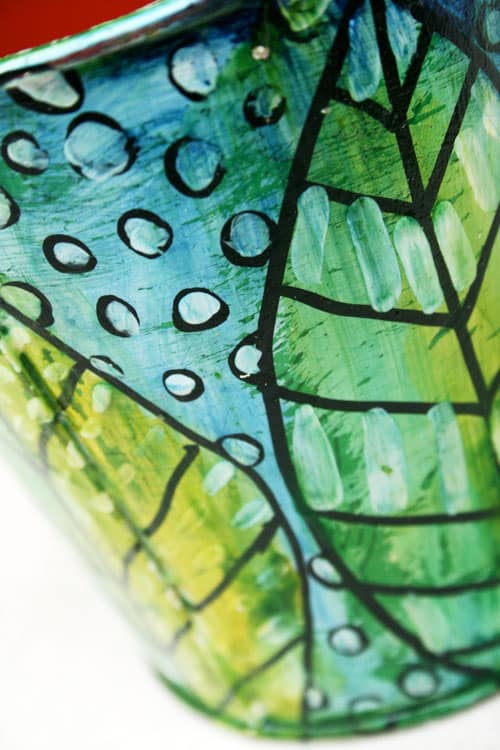
I love the results and can’t wait to fill them with pens and brushes and have them sit on my desk! If you’d like to do something similar, here are some tips for painting on metal.
Start with a Clean Surface
Metal often has oils, dust, or manufacturing residue on it that can prevent paint from adhering properly. Before you begin, wipe the surface down with rubbing alcohol, acetone, or a degreasing cleaner. Even if the metal looks clean, taking this extra step helps ensure that your paint bonds well and doesn’t peel later.
Lightly Sand for Better Adhesion
One of the challenges of painting on metal is that it’s so smooth. A quick pass with fine sandpaper (around 220–400 grit) will give the surface a bit of “tooth” so that primer and paint can grip it more effectively. You don’t need to aggressively sand—just enough to slightly dull the surface.
Use a Primer Designed for Metal
Primer is your friend when working on metal. It helps paint adhere and creates a more stable painting surface. Look for primers labeled specifically for metal. Once the primer is dry, the surface will behave much more like other painting surfaces you’re used to. I always spray paint outside and wear a respirator.
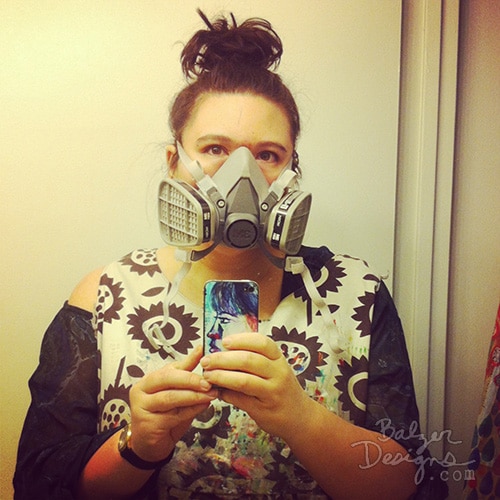
Your lungs are for life. Treat them well. If you don’t want to use a spray primer, you can also use regular old gesso, which is what I did for this project.
Choose the Right Paint
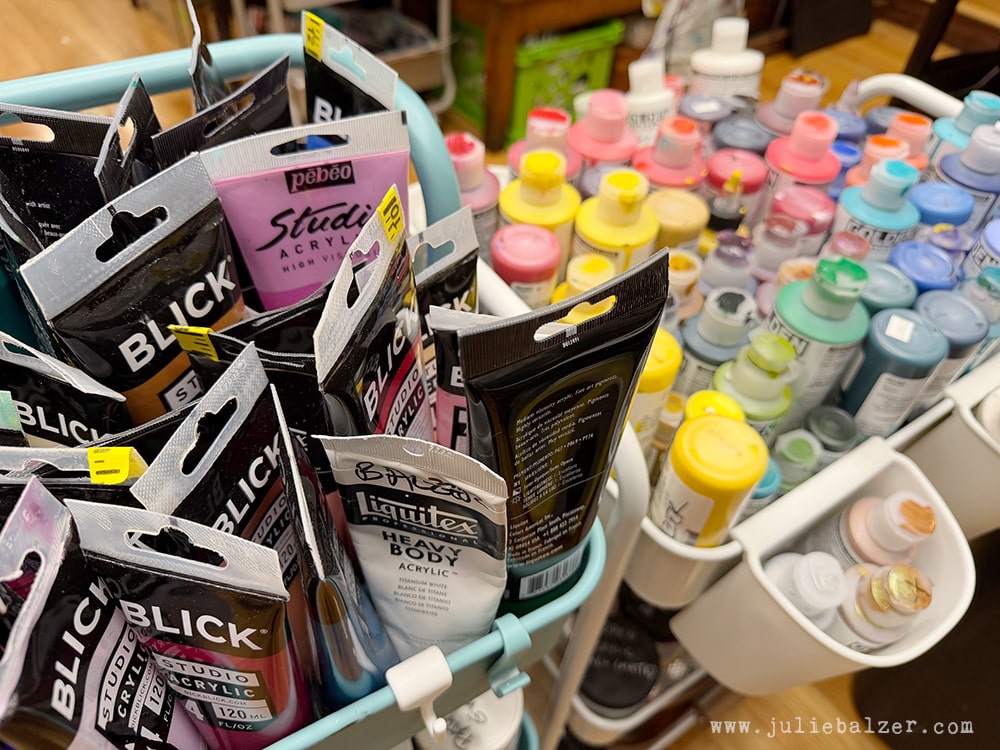
Many kinds of paint can work on metal, including acrylics, oils, and spray paints. Acrylics are often the easiest choice because they dry quickly and are widely available (and speaking for myself, I’ve got a huge stash of them, so I don’t need to buy anything new).
Be Mindful of Drying and Curing
Because metal is non-porous, paint tends to sit on the surface rather than soaking in. This can mean longer drying times and a greater risk of smudging while you work. Try to build your painting in thinner layers and allow adequate drying time between them.
Seal the Finished Work
A final varnish or sealer can protect your painting and help it last longer. This is especially important if the piece will be handled frequently or displayed in a humid environment. Choose a clear varnish compatible with your paint type and apply it once the painting is completely dry. I used a gloss medium to seal mine.
Final Thoughts
If you’ve never painted on metal before, it’s worth trying. A small aluminum panel, metal tag, or salvaged piece of sheet metal can be a great place to start. The combination of a durable surface and a slightly unconventional material can open up some exciting possibilities in your art practice.
Thanks for stopping by!
Wow! Love these buckets! Did you use acrylic paint for these?
What a fresh and colourful design. Beautiful!
Oh wow! Love how you customized them with your own style. Is it just acrylic paint and doesn’t come off! Very cool!
Fantastic!! the idea to paint them is just great, and I especially like the one with the circles – how did you manage so many layers and doodles inside each circle?
Those are great! Did you put a sealer of some sort on them so the paint wouldn’t get scratches in it? I was just wondering.
These are fabulous! Bright and cheery!
Your paint is a fabulous improvement.
Awesome! love them! did you prep them before you painted them?
OK Julie…you are too talented!
The circles that you painted look like mirrors and I feel like I’m also looking through a marble (does that make any sense?).
These are too cool, I think I might have to try this.
SIMPLY AMAZING!!! WOW – now they are priceless!!!
Brigitte – Yes, I prepped them with gesso.
Gina – I did seal them. I used a gloss multi medium.
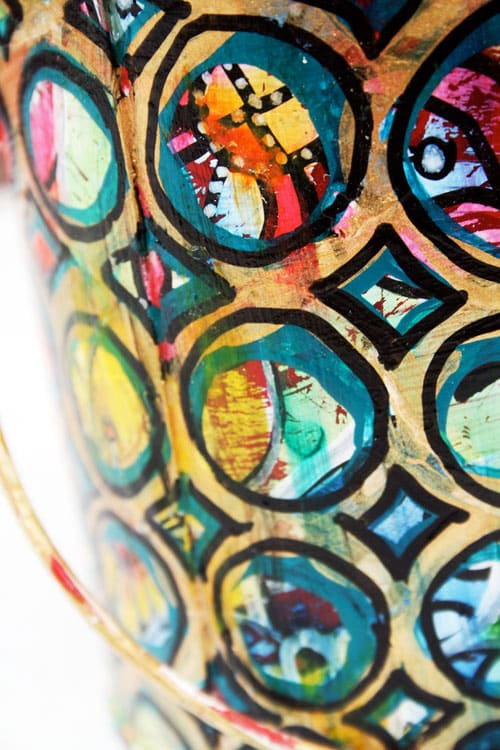
Hagit — The circles are painted over an entirely separate design. So what youre seeing are peeks of the design underneath.
Linda – its acrylic and I sealed it.
Sandra – yes, theyre mostly acrylic paint!
Ok, how did you get the paint to stick?! And your version looks WAY better then the original. I’m not sure which of yours I like better… they’re both great :o)
you didn’t just “splash paint” on those because those are works of ART!!! Gorgeous transformation!
so much fun! and what a perfect place for your brushes!
Oh Julie, these are gorgeous!
soooo awesome. i like how your art is so you. if i saw these in the store i would 1. buy them (duh! haha) and 2. say they were very “Julie Fei-Fan Balzer.” thanks for sharing.
Awesome!!
I bow to your awesome vision and artistic talent. Bravo!
oh, I passed by those buckets yesterday!! Now I’ll look at them with better eyes, your customization is stunning!!!
ARGH! I was just in Mike’s yesterday and passed by those buckets and just said “nah, not my style”. Never occurred to me to paint them! Oh well, another reason to go buy some. My daughter and I can never have enough storage for pens, brushes, markers, pencils, scissors, etc.
AMAZING! I love to alter stuff but I’ve neve worked with tin or gesso. I’ll have to check out how to work with gesso as I’ve read it often on your blog (which needless to say, I so enjoy reading!) 🙂
there isn’t a single post on your blog where i don’t totally love everything you do. really, you’re just awesome.
I totally agree with Sandra. Ever since I saw u on TV and found your website I am so inspired! Thank you!
ok…when do I fit in painting buckets…I’m in the middle of your Deli and Collage tutorials right now…but it’s going the list…I saw plain tin containers at the container store today…I could start with those;) am having so much fun, but I think I’md dreaming in layers!