
Happy Tuesday! I wanted to share a link with you today. One of my online students, Zoe Ford, wrote a wonderful blog post about her experience so far in my online Junque Journal class. Her tweet just about sums up her thoughts on the class…
…and I hope you'll check out her post, which is full of colorful photos!
Now onto our guest poster! Melita is sharing one of my most beloved and most used techniques. Definitely one of the ones I use in my art journal all the time. I hope you enjoy it!
Hi there! My name is Melita Bloomer and I am super excited to be joining you all here today! I’ve been a long-time fan of Julie’s stencils so I can’t wait to share one of my favourite techniques for using them – what I call the blackout method.
Have you ever created a background you love, but then been stuck on what to do next? Or maybe you’ve messed something up and are looking for a way to save it. This fun little trick is the perfect solution.
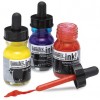
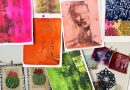
Choose, or create a fun, and full, background. Mine was made using Liquitex Acrylic Inks, and then lots of messy journaling on top.
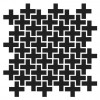
Next, choose a stencil with a bold, open design, such as Julie’s Blazonry, in 12×12. I have tried more intricate designs, and failed miserably. But if you can make it work, go for it! And please tell me how lol Trace through your chosen stencil, being sure to choose a pen that you can see against your background.
Fill in the negative areas of the stencilled design, with your choice of colour. I went with black gesso to be sure I got good coverage over such a bright background. Lighter colours, white gesso, or a combo, can give a great result too.
To break up the black a little, I added some gesso spots using Julie’s Tiny Circles stencil, in 6×6. I love that it adds a bit of extra interest, another layer of painty goodness. You can even add in more journaling, or a quote ate this stage. Whatever your heart desires!
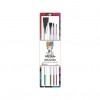
Take a pen and outline your stencilled shapes, using a contrasting colour. I used a Sakura Gelly Roll – it’s quite opaque, and one of my favourite pens. This step adds more definition, and helps the design pop back through again.
And there you have it. A bold background transformed into a funky journal page. Super easy & fun!
Thanks for letting me share one of my favourite techniques Julie – I hope you all have fun trying it out!
SUPPLIES USED:
           |
My name is Melita and I live in Melbourne, Australia. I am a WAHM of two gorgeous girls, and am happily married to my high school sweetheart. I am a total bookworm, love my movies, and can’t resist a good tune!
I have always been a crafty person – scrapbooking, art journaling and much more, but these days I am primarily a mixed media artist, working with just about any medium I can get my hands on. I am on an ever changing artful adventure, stumbling along, finding my feet, and loving every minute of it.
LINKS:
Site: http://melitabloomer.com
Instagram: http://instagram.com/melitabloomer
Twitter: http://twitter.com/melitabloomer
Facebook: http://facebook.com/melitabloomer
YouTube: http://www.youtube.com/user/litabells
Fantastic technique! I must remember to try it! 🙂 thank you for sharing! Hugs,
Ingrid xx
Fantastic technique! I must remember to try it! 🙂 thank you for sharing! Hugs,
Ingrid xx
Fantastic technique! I must remember to try it! 🙂 thank you for sharing! Hugs,
Ingrid xx
Fantastic technique! I must remember to try it! 🙂 thank you for sharing! Hugs,
Ingrid xx
Fantastic technique! I must remember to try it! 🙂 thank you for sharing! Hugs,
Ingrid xx
I really need to stop reading these at work…all I want to do is play in my art journal now!!! Thanks for sharing this–can’t wait to get home and try it out!
I really need to stop reading these at work…all I want to do is play in my art journal now!!! Thanks for sharing this–can’t wait to get home and try it out!
I really need to stop reading these at work…all I want to do is play in my art journal now!!! Thanks for sharing this–can’t wait to get home and try it out!
I really need to stop reading these at work…all I want to do is play in my art journal now!!! Thanks for sharing this–can’t wait to get home and try it out!
I really need to stop reading these at work…all I want to do is play in my art journal now!!! Thanks for sharing this–can’t wait to get home and try it out!
Brilliant technique and I can’t wait to try it!
Brilliant technique and I can’t wait to try it!
Brilliant technique and I can’t wait to try it!
Brilliant technique and I can’t wait to try it!
Brilliant technique and I can’t wait to try it!
Wonderful idea!! Love it.
Wonderful idea!! Love it.
Wonderful idea!! Love it.
Wonderful idea!! Love it.
Wonderful idea!! Love it.
Melita, did you mask off the blazonry areas to stencil the circles over the black negative space? Thanks so much for sharing.
Melita, did you mask off the blazonry areas to stencil the circles over the black negative space? Thanks so much for sharing.
Melita, did you mask off the blazonry areas to stencil the circles over the black negative space? Thanks so much for sharing.
Melita, did you mask off the blazonry areas to stencil the circles over the black negative space? Thanks so much for sharing.
Melita, did you mask off the blazonry areas to stencil the circles over the black negative space? Thanks so much for sharing.
This is really cool and I must try it soon!
This is really cool and I must try it soon!
This is really cool and I must try it soon!
This is really cool and I must try it soon!
This is really cool and I must try it soon!
Hi Mary! Nope, I didnt mask off the areas – I just kind of eyeballed it and hoped for the best. You can see a couple of spots where Ive gone into the coloured area a little, but imperfection nevr bothered me lol
Hi Mary! Nope, I didnt mask off the areas – I just kind of eyeballed it and hoped for the best. You can see a couple of spots where Ive gone into the coloured area a little, but imperfection nevr bothered me lol
Hi Mary! Nope, I didnt mask off the areas – I just kind of eyeballed it and hoped for the best. You can see a couple of spots where Ive gone into the coloured area a little, but imperfection nevr bothered me lol
Hi Mary! Nope, I didnt mask off the areas – I just kind of eyeballed it and hoped for the best. You can see a couple of spots where Ive gone into the coloured area a little, but imperfection nevr bothered me lol
Hi Mary! Nope, I didnt mask off the areas – I just kind of eyeballed it and hoped for the best. You can see a couple of spots where Ive gone into the coloured area a little, but imperfection nevr bothered me lol
GAH! Melita, this is gorgeous and you did such a great job Guest Posting on Julie’s blog! So exciting!
GAH! Melita, this is gorgeous and you did such a great job Guest Posting on Julie’s blog! So exciting!
GAH! Melita, this is gorgeous and you did such a great job Guest Posting on Julie’s blog! So exciting!
GAH! Melita, this is gorgeous and you did such a great job Guest Posting on Julie’s blog! So exciting!
GAH! Melita, this is gorgeous and you did such a great job Guest Posting on Julie’s blog! So exciting!
Awesome technique, Melita! I love the vibrant contrast this creates 🙂
Awesome technique, Melita! I love the vibrant contrast this creates 🙂
Awesome technique, Melita! I love the vibrant contrast this creates 🙂
Awesome technique, Melita! I love the vibrant contrast this creates 🙂
Awesome technique, Melita! I love the vibrant contrast this creates 🙂
i have wanted to do this for ages cant wait to try now thanks
i have wanted to do this for ages cant wait to try now thanks
i have wanted to do this for ages cant wait to try now thanks
i have wanted to do this for ages cant wait to try now thanks
i have wanted to do this for ages cant wait to try now thanks
great technique, it turned out so cool! I think I know what I am going to do for holiday cards now. woowoo!
great technique, it turned out so cool! I think I know what I am going to do for holiday cards now. woowoo!
great technique, it turned out so cool! I think I know what I am going to do for holiday cards now. woowoo!
great technique, it turned out so cool! I think I know what I am going to do for holiday cards now. woowoo!
great technique, it turned out so cool! I think I know what I am going to do for holiday cards now. woowoo!