
If you’re a mixed media technique junkie, you’re going to adore this fun and easy way to add texture and dimension to your artwork! In this tutorial, I’m sharing one of my favorite ways to combine stencils, modeling paste, and embossing powder for a unique, layered effect: heat embossing with modeling paste and stencils creates the coolest dimensional designs!
Getting Started: Materials You’ll Need
To recreate this mixed media technique, gather the following supplies:
- Stencil (I used one of my designs, manufactured by The Crafter’s Workshop – Scattered Branches)
- Modeling Paste or Molding Paste (I used a light and fluffy version)
- Palette Knife (for spreading the paste)
- Embossing Powder (two contrasting colors for a multi-tone effect)
- Heat Tool (to melt the embossing powder)
- Scrap Paper or a Non-Stick Surface (to keep your workspace clean)
Tutorial Video
Step 1: Prepping Your Stencil and Surface
Start by placing your stencil onto your surface. You can tape it down or use spray adhesive if you want a cleaner application, but I usually just hold it in place.
Now, scoop a generous amount of modeling paste onto your palette knife and spread it over the stencil as if you were frosting a cake. Work in even strokes to create a consistent layer of modeling paste. When you’re done, remove the stencil.
Step 2: Adding Embossing Powder
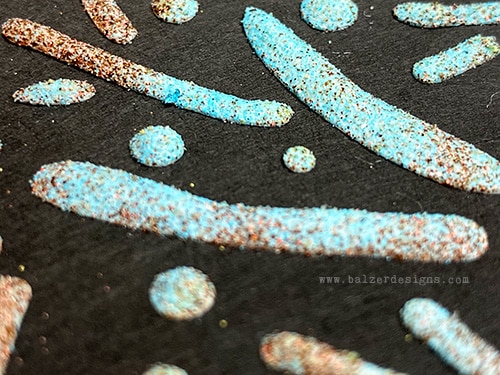
Before the modeling paste dries, sprinkle embossing powder over the wet areas. I like to use two contrasting colors for extra depth. Start with the lighter color first to avoid contamination when pouring the excess back into the jar.
The embossing powder will stick to the wet modeling paste.
Step 3: The Magic of Heat Embossing
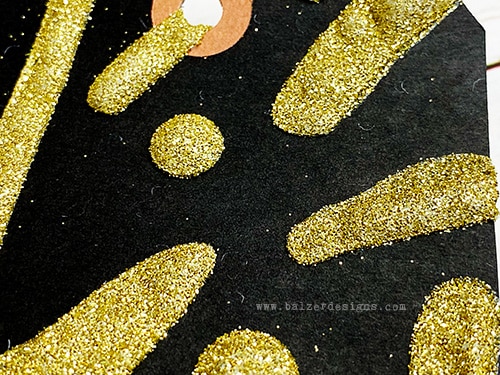
Now for the fun part—heat embossing! Use a heat tool to gently melt the embossing powder. If you’re using metallic embossing powder, I recommend heating from the back first to prevent over-melting, which can dull the shine.
As the embossing powder melts, you’ll see it transform into a raised, glossy, and dimensional texture that enhances the modeling paste underneath. No matter how many times I do it, it always feels like magic.
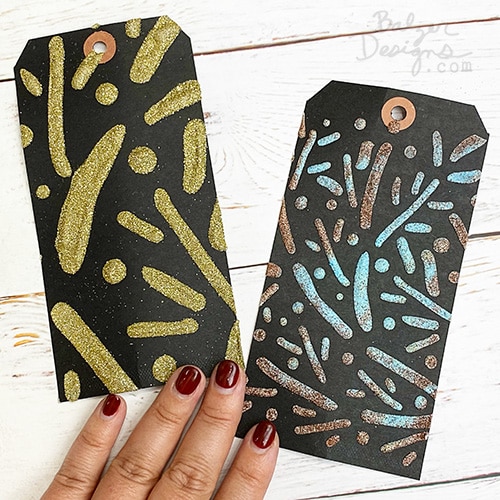
Final Results: Dimensional and Textured Mixed Media Art
Once the piece cools, you’ll be left with a stunning, textured design that maintains its raised effect. It’s a fantastic way to add depth to your mixed media projects, whether you’re working on art journals, tags, canvases, or scrapbooks.
This mixed media technique is super versatile—you can experiment with different stencils and embossing powders to create your own unique designs. Give it a try, and let me know how it works for you! Also, keep in mind that there are lots of different mediums that you can use for heat embossing. Embossing powder will stick to anything that’s wet. Have you ever tried heat embossing with paint or spray ink or another non-traditional medium? I’d love to know!
Thanks for stopping by!
You might like:
- Lots more stencil techniques.
- Embossing Powder in the extreme.
- My Art Practice monthly membership.

Such a cool idea and the stencil is fabulous!
I have used plain gel medium with embossing powder, and then used the heat gun to “blow” the resulting gook into ripples and waves. Very cool effect.
Thanks Julie! I can’t wait to try this technique for my ATC prompt: TEXTURE. It will be perfect.
Such fun!!!!
Definitely cool!!! You have a great imagination and talent! I have a lot of projects to create come the cooler weather.
FUN! I haven’t embossed in ages and have done very little with modeling pastes but this could send me looking for the supplies. When I did more embossing I sometimes created texture by randomly dabbing my embossing ink on the page and heating it. No smooth texture all over but great sandy feel to it. I also kept a jar of mixed powders when I only had little bits left. Always a surprise when you heat that up!
Soo cool! I got to try this. Thanks for sharing!
I’m definitely trying this!