
If you think of an electronic cutter, you probably think of cutesy cookie cutter designs. Not me. I think of it as a powerful tool for mixed media artists, like me, to express themselves. I love my ScanNCut because it allows me to express my own quirky style quickly and easily. It cuts through a wide variety of materials, allowing me to make lots and lots of my own custom art tools!
Before we begin, let’s go over the different ways that artists and crafters can create custom cut files for their ScanNCut machine:
- Combining built-in designs using the editing functions in the ScanNCut machine. I have a video for that.
- Using the built-in scanner to scan my own original drawings or copyright free artwork from books or the internet. I have a video for that.
- Using the free computer-based software, CanvasWorkspace. I have a video for that.
- Using the mobile-device based app, Artspira. I have a video for that.
- Using any third-party software (such as Illustrator) that can output an SVG cut file. I have a video for that.
Note: Some of the videos in this post are old. Still great, but older videos using older ScanNCut models. For the most up to date tutorials, join my ScanNCut Club on YouTube and get new tutorial videos every month!
Now that you understand all the ways that you can create custom cut files, here are 5 ways for mixed media artists to use the ScanNCut:
Technique 1: Make Foam Stamps
You can easily design and cut your own foam stamps. Here are some that I’ve created using the ScanNCut:
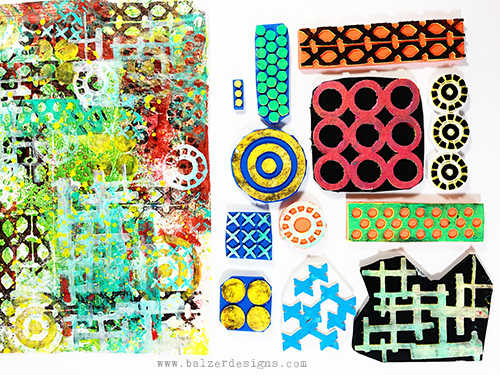
And here’s a video on how to make your own:
I have a blog post that goes into greater detail about making foam stamps (and has a video featuring the ScanNCut DX) HERE. That post also features a list of blog posts that offer instructions on how to use foam stamps in your mixed media projects — whether they’re home made or store bought.
Technique 2: Make Custom Stencils
You can also easily design and cut your own custom stencils. Here is a recent favorite stencil I cut with my ScanNCut:
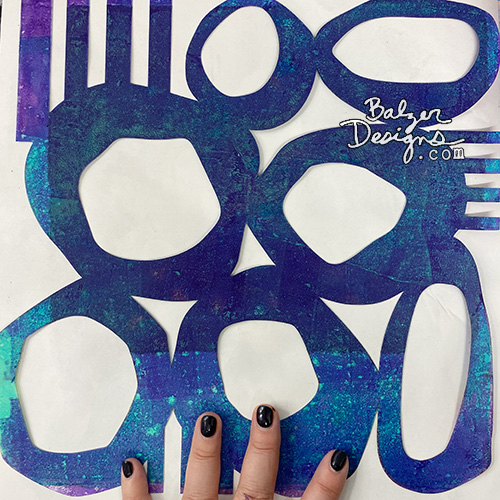
If you’d love to make stencils for your mixed media artwork, here’s a video covering the most asked about stencil design question: How do I make a stencil that doesn’t fall apart? The answer is: You build a bridge!
Additional Stencil Resources:
- You can check out THIS POST with lots more information on cutting stencils with your ScanNCut.
- You can watch tons of my free stenciling tutorials on YouTube. As of today, I’ve posted 109 videos for my stencils and stenciling playlist on my YouTube channel and that number is only growing!
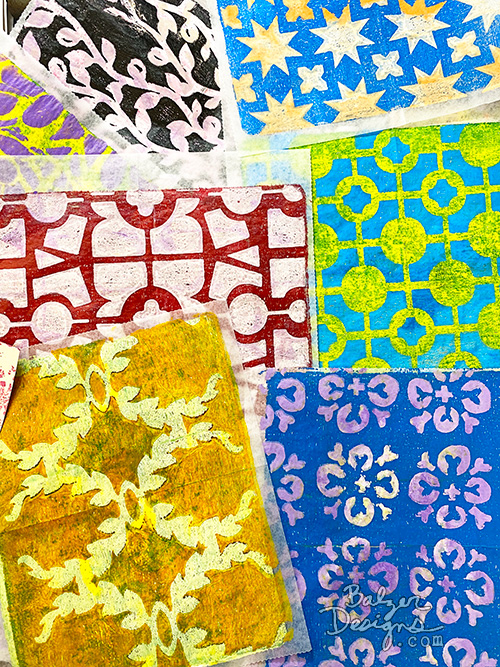
- I also have an online class that goes into lots and lots of detail about how to design and cut your own custom stencils with the ScanNCut. Here are some gelatin printed papers using the stencils from that class:
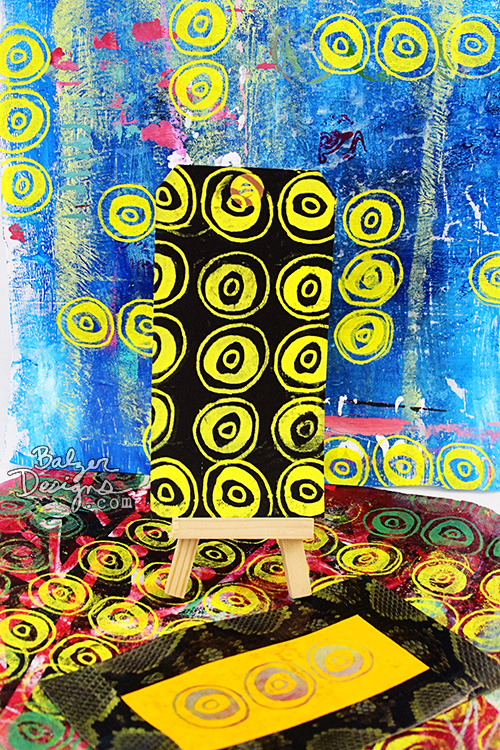
Technique 3: Make Custom Screens for Screen Printing
Making custom screens is one of my favorite mixed media techniques and I love that you don’t need any fancy equipment or materials. All you need is your ScanNCut, a sheer curtain (buy an orphan curtain at the thrift store), and some heat transfer vinyl (HTV).
Here is an example of a custom ScanNCut screen:
And here’s a video on how to make your own custom screen:
This video is from a longer blog post, which you can read HERE. Also, check out my class all about screen printing at home — no ScanNCut machine required. And I even have a blog post all about screen printing on cookies!
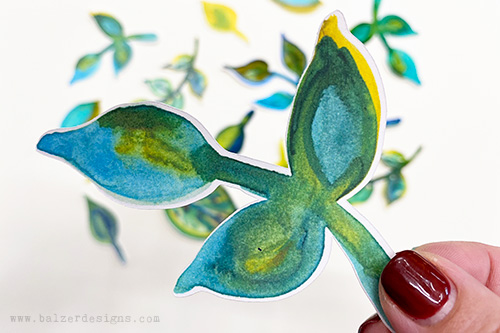
Technique 4: MAKE CUSTOM EMBELLISHMENTS
I love that the ScanNCut is able to fussy cut around an entire sheet of stamped or even hand painted images. Here are some leaves I painted with watercolor and then had the ScanNCut cut out using the Direct Cut command:
Watch this video on how Direct Cut works with stamped images — specifically a stamped sentiment:
You can find several other videos about Direct Cut in the ScanNCut Club videos on YouTube.
Technique 5: Cut Painted Paper
Collage is one of the main facets of my mixed media art practice. As a result, I have tons of painted paper and I looooove to cut it up to use in my artwork.

The ScanNCut makes that process of cutting fast and easy. Watch the video for tips on cutting painted papers:
The Power of Creating Your Own Mixed Media Tools
Creating your own mixed media tools, like foam stamps or custom screens for screen printing, is a game-changer for any artist. It allows you to tailor your tools to fit your unique artistic vision, opening the door to endless creative possibilities. Handmade designs add a personal touch to your work, ensuring your art stands out and feels truly original. Plus, the process of designing and crafting your own stencils, stamps, or paper cuts enhances your skills, fosters resourcefulness, and can save money compared to buying pre-made supplies. Ultimately, creating your own tools and supplies empowers you to take full control of your creative process and express your style in a completely customized way.
If you’re an artist who uses the ScanNCut to make tools for your art, leave me a comment letting me know what you love to make with your ScanNCut!
For the most up to date ScanNCut tutorials and to ask me your ScanNCut questions, join my ScanNCut Club on YouTube and get new tutorial videos every month!
Yes! I use my ScanNCut All. The. Time. I am a mixed-media artist with an aversion to using any commercial stamps, stencils or embellishments. I don’t even like using the prefab templates in Workplace. I LOVE being able to draw my own designs, scan them in & cut them out in a matter of minutes.
I have a big problem with the mats. They wear out incredibly fast, in terms of their adhesion. I’m sorry to say I regret my purchase.
Cathy, try wiping your mat down with an alcohol free baby wipe. It cleans ithe mat and after it dries it should be sticky again. Also, be aware there are many ways to get your mat sticky again, see U Tube videos, but also be aware using those methods will void your warranty.
One trick I use, when my mat is less sticky, I use any washi, or painters tape to hold down my cardstock. I get great results.
With any machine, these items are necessary replacements. Give the alcohol baby wipes a try. I hope you don’t give up because this is the best machine out there.
Alcohol Free baby wipes.
The simple trick that solved this problem for me is to BRAYER the paper down firmly onto the mat. I couldn’t believe how much difference that made!
I agree Sue! That works for me.
I’m so glad you’re enjoying your ScanNCut!
Hey Cathy, Joanne is right. Cleaning and taping make a big difference. And the brayering tip from Sue is a great one. I do all three of these things every time I use my SNC.
I will try it, for sure. Thank you.
I definitely have to explore more I bought my scan and cut but barely used but after my moving I will commit to do some stencils and stamps
I learned it from you, Julie ;-D