
Karen is back with a tutorial on heat embossing through your stencils! This is one of my favorite things to do. Over time I have discovered that my beloved Ranger Heat It tool is not the best heat gun for the job. When embossing large stenciled areas, I recommend the American Crafts Zap heat gun. It melts embossing powder super fast!
If you've never heat embossed before, it's kind of magical. Embossing powder will only stick to where there's wet ink. And since embossing powder is made of plastic particles, once it's been heated and melted, it's pretty impervious to wet media, making it the perfect product for resist techniques! So, without further ado, here's Karen…!
I am back with another stencil technique- again thanks Julie for the opportunity! Today we are doing stencil resist. There are so many ways to use this technique so here are a few.
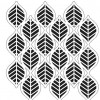
First I use my stencil, Emboss It Dabber by Ranger, & clear embossing powder. You can also use a Distress Ink pad but the Emboss It makes the process much easier. We are going to start with pattern cardstock. Place your stencil down & dab, dab, dab the “emboss it” all over. At this point I thought there has to be a better way to do this for embossing large areas. Hum, ponder. Next step, remove stencil, you will probably see, not much of anything. Pour clear emboss powder onto area & heat set. Tip: if you let your heat gun warm up for about 30 seconds, it will emboss better.
When the powder is completely melted- (there will be no granules) & your image just looks wet. Kind of boring at this point. Let the tag cool completely. Now for the spraying. I sprayed Distress in pewter first but the pattern was too busy & the resist did not show well.
Next was Dylusions, still not very noticeable.
Last I sprayed with black acrylic mix and that was a bit better but still not great.
For this tag I was not overly happy with the result. Lesson- dark busy pattern paper might not be the best, especially if the stencil has small detailed areas. So I picked a light pattern paper & the same stencil.
Clear heat emboss step- like a watermark image. Already seems to have potential.
As this was a test I went with the same sprays- Distress in brushed pewter first. This created an interesting soft, subtle look with that metallic simmer.
Next up Dylusions in Cherry Pie. Nice. Great image with the interest of the pattern paper and bonus it is shimmery because of the brushed pewter underneath.
Last, I did part of the tag in the black acrylic. Now the stencil image really pops. I do like the 2 colors, very fun. Out of the 2 tags I like this one better but I think there is potential for the busy pattern by either using a stencil that has larger open spaces or by using a color emboss powder instead of the resist technique.
Here I used white embossing powder-to me this has potential. I could go in with some Archival color or alcohol ink to distress it. Remember you need a permanent ink to color on the embossed areas.
Here is another way to the stencil resist technique that is quite dramatic.
On an art journal page- use multiple colors of sprays, inks, or paint. Dry thoroughly. Use the emboss resist technique with clear powder using a stencil with large open spaces. Tip: Embossing such a large surface I was worried about the embossing ink drying so I embossed 1/3 of the image at a time- removing the stencil before heating (your heat gun will melt the stencil) than lining it up each time to repeat.
Now for the scary part- cover the page in black soot Distress Stain. The reason I used stain instead of paint, embossing easily resists the stain. This makes for a very dramatic background. You could also use sprays that are water based like Dylusions, Distress…Wipe the emboss areas to take off excess stain.
As a completed art journal page. The background was so cool I did not want to cover it up! Thanks to Julie for letting me play on her blog!
SUPPLIES USED:
         |
I have always been crafty, cross stitch, knitting, and quilting. Got into scrap booking about 14 years ago and then moved into the inky side of things. I haven’t looked back and it became the addiction that stuck. Art journal followed in 2009 where I became a technique lover, can never learn enough! Stamps, stencils, paint, and sprays are my favorites. Just to name a few. I often find the cool technique while making mistakes-hum…. My first teaching gig was in summer of 2010. I love to teach & inspire, especially when I hear the words “I can’t believe I made this”. I currently teach everything from mini-albums to art journal & altered art. I love taking photos especially with all the fun photo apps available. Currently struggling with slowing down time, embracing the chaos and taking time to breath. Focusing on saving stress for only really important things, finding the joy not the negative, being healthy. My most important job is mother to 3 goofy, active and fun loving kids. I am paid in hugs, laughter, stress and love.
You can find me at karenbearse.blogspot.com
Very cool technique! thanks for sharing it Karen!
Very cool technique! thanks for sharing it Karen!
Very cool technique! thanks for sharing it Karen!
Very cool technique! thanks for sharing it Karen!
Very cool technique! thanks for sharing it Karen!
Haven’t bought the Emboss It Dabber yet. I must get one now to use with all my stencils!
Haven’t bought the Emboss It Dabber yet. I must get one now to use with all my stencils!
Haven’t bought the Emboss It Dabber yet. I must get one now to use with all my stencils!
Haven’t bought the Emboss It Dabber yet. I must get one now to use with all my stencils!
Haven’t bought the Emboss It Dabber yet. I must get one now to use with all my stencils!
Absolutely love that you shared the “not perfect” tags that you created first. Helps me to not make the same mistake! Cool technique – thanks for all the pics and tips!
Absolutely love that you shared the “not perfect” tags that you created first. Helps me to not make the same mistake! Cool technique – thanks for all the pics and tips!
Absolutely love that you shared the “not perfect” tags that you created first. Helps me to not make the same mistake! Cool technique – thanks for all the pics and tips!
Absolutely love that you shared the “not perfect” tags that you created first. Helps me to not make the same mistake! Cool technique – thanks for all the pics and tips!
Absolutely love that you shared the “not perfect” tags that you created first. Helps me to not make the same mistake! Cool technique – thanks for all the pics and tips!