
Pattern Leaf Stenciled Card
Hi everyone! I’m Sara Naumann. First, a big thank you to Julie for being so gracious and letting me share my slight—okay, out of control—stencil addiction with you today!
I love combining stencils with heat-embossing—it’s a great way to add texture, shine and dimension. It also gets double duty from your stencils and embossing powders.
For this card, I’m using the Pattern Leaves. It’s one of my favorite stencils because it’s a great basic and it’s super-versatile. It’s also perfect for this stencil-embossed technique. I’m a step-by-step kind of gal, so you can check out the process with photos below—you can also watch the video tutorial!
The leaf shape is stenciled onto a heat-embossed background, so let’s start there and build our way up.
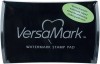
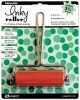
First, brayer embossing ink thoroughly onto a piece of white matte cardstock. Immediately sprinkle with Opaque Primary Sunny Yellow embossing powder. Tap off the excess and heat set. Be sure to allow plenty of time for embossing, and for the melted powder to cool.
Lightly brayer embossing ink on top of the yellow and emboss with Primary Sunset Orange. Notice that I’m getting the “tracks” of the brayer. Cool!
Place your stencil on top of the embossed piece. You can use any of the leaves—or all three!—but I chose the bold silhouette. You’ll want to tape it down to the embossed piece with masking, stencil or washi tape.
Press the embossing inkpad through the stencil. Lift off the stencil and immediately cover with Primary Apple Red. Heat set.
Voila!
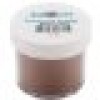
Why stop with just three layers of embossing? Use your finger to tap embossing ink onto the leaf design, then emboss with Metallic Copper Sparkle Embossing Glitter.
Like this!
The last step? I inked the edges of the piece with embossing ink, then tapped on Primary Apple Red and heat-set it as well.
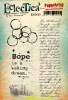
The rest of the card is very simple: Brads are at each corner, and the piece is then matted on kraft and black cardstock. The teal cardstock is stamped with the script and circles design from Eclectica ESN10. Twine goes around the corner and the entire piece is matted with red cardstock onto a black card base.
Again, a big thank you to Julie for having me over today! I hope you enjoyed the technique and get inspired to put your stencils and embossing powders to use!
SUPPLIES USED:
         |
Born and raised in the US, Sara has taught papercrafting techniques all over the world. She loves adventure, and currently lives abroad.
Sara is a full-time designer in the craft industry. As a regular columnist for papercrafting magazines, she’s constantly exploring new techniques, ideas and products to share with fellow crafters. Her newest DVD is Mixed Media Made Easy, available at Paper Wishes. When she’s not teaching, designing, writing or hosting her weekly You Tube show, Sara’s spending time with her family and chasing after her small crafter-in-training daughter.
Visit her online—and don’t forget to sign up for her weekly email newsletter, full of videos, free projects and more!
Sara, Great Technique!!
Sara, Great Technique!!
Sara, Great Technique!!
Sara, Great Technique!!
Sara, Great Technique!!
I love this technique – thank you for giving me some great ideas
I love this technique – thank you for giving me some great ideas
I love this technique – thank you for giving me some great ideas
I love this technique – thank you for giving me some great ideas
I love this technique – thank you for giving me some great ideas