
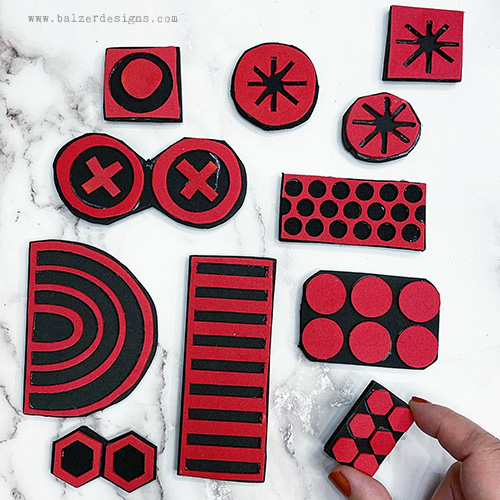
Foam stamps are a versatile and fun tool for any mixed media artist or crafter. They’re perfect for adding texture, patterns, and personal touches to your art journals, scrapbooks, and more. In this tutorial, I’ll show you how to create your own foam stamps using the ScanNCut machine. (And you guys, making foam stamps with your ScanNCut is a super duper easy peasy breeze!) Watch the video for the how-to:
If you have a newer ScanNCut DX machine, watch this video to see how to cut foam using the ScanNCut DX’s Auto Blade:
For the most up to date tutorials, join my ScanNCut Club on YouTube and get new tutorial videos every month! There’s a foam stamp video for members, right HERE.
Why Foam Stamps?
Foam stamps are lightweight, easy to handle, and adaptable to different mediums. Whether you’re working with paint or ink, foam stamps give you endless design possibilities. Plus, making your own stamps means you can tailor them to your unique style!
These blog posts share foam stamping techniques that you may be interested in trying:
- Watercolor Prints with Foam Stamps
- Using a Foam Stamp on Fabric
- 3 Art Journal Backgrounds Using Foam Stamps
Step-by-Step Guide to Making Foam Stamps Using Your ScanNCut
- Choose Your Design
- Select a pattern from the built-in options on the ScanNCut or upload your custom design.
- In the video, I opted for a floral design but you can experiment with shapes, text, or even hand-drawn sketches.
- Prepare Your Foam
- Use thin foam sheets for the design you’re cutting (top layer).
- Only use thicker foam for the stamp base.
- Be sure to tape your foam to the mat for best results, especially when using the ScanNCut DX machine, because the machine will make multiple passes.
- Adjust Machine Settings
- Set the blade depth and cutting speed appropriately.
- In the first video I use:
- Blade depth: 10 (or test for your machine)
- Cut speed: 1
- Cut pressure: 9
- When using the AutoBlade, you do not need to manually adjust the settings.
- Pro Tip: Always do a test cut to ensure perfect results!
- Cut and Assemble
- Once your design is cut, adhere it to a thick foam base using waterproof glue.
- This ensures durability, especially when washing your stamps after use.
- Let the adhesive dry fully before trimming excess foam for a polished look.
- Notes
- Reverse Text: Remember, text designs need to be mirrored to stamp correctly.
- Personalized Stamps: Add names, logos, or custom motifs to really make the designs your own!
Tips for Using Foam Stamps
- Apply even pressure for a clean print. Press your palm on the back of the stamp if it’s large.
- Use acrylic paints or stamping ink for vibrant results. I love to use Golden OPEN acrylic paints with my foam stamps because of it stays wet longer.
- Clean stamps with warm water and mild soap after each use. I often use an old toothbrush to scrub them under running water.
So grab your ScanNCut and start crafting your own foam stamps today in order to add a personal, artistic flair to your mixed media projects.
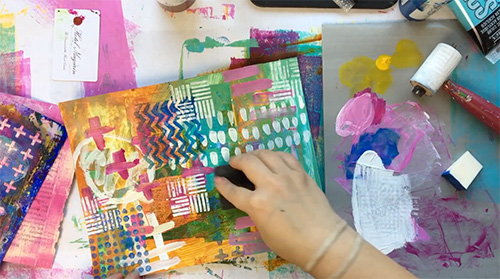
Remember, you can make stamps from your own drawings, from clip art, from the built-in designs in the ScanNCut machine…whatever you want! I love to use foam stamps for Gelli Printing or any other painty application.

What do you use your foam stamps for? I’d love to know!
WOW it’s amazing what that machine can do. So cool.
Wonder if you could rent one of those machines?
Hi Julie,
I have been looking all over the web to find out how to make rubber stamps for stamping using my scan n cut. I do have some foam similar to what you are using but thought it to thick.
I see you used 1/8 inch thick craft foam. I was looking for 0.04 rubber.
Thank you so much for showing this tutorial on how to make ink stamps. I will try it out and see how it works.
Very cool. The designs and machine, both. You are so creative. Michelle t
What if you just threw the stamps into a box filled with water? Would that make it easier to clean?
Nice demos
Someday, that machine will be mine!
After watching many of your ScanNCut videos, I am starting to think that I should consider buying one of these machines. I looked on Amazon and saw that there is a photo scanner attachement too. Do you use one of those?
Thanks for being in my mailbox every morning. It is lovely to watch your creativity unfold with your vivacious outlook on life.
Great idea, Julie! The Scan N Cut is soooo coool!
I like foam stamps for stamping with Gesso over a really colorful painted page. They give a good bold design rather than using traditional rubber stamps and I don’t mind ruining the foam stamps I make by using them with gesso. My rubber stamps (and acrylics) are too precious to me to get them all gunked up with gesso.
Hi Julie,
Just wanted you to know I tried out your technique for making stamps using the Brother Scan N Cut.
I made the Witch design and reduced the size down within the brother scan n cut. I use 1/16″ craft foam. I tried the settings and the deep cut blade.
I did not get good results with my test cut with that. I then switched off to the standard blade and used your settings and got a great cut.
I trimmed around the edge like you did and did a test print. I used water based ink. It did a great job. I will have to get some thicker foam to place the stamp on. In the future I will buy the 1\8″ thick craft foam for the stamps. I find the 1/16″ to be a little thin but it still works fine.
Keep those great ideas coming with the brother scan n cut. I look forward to your email everyday and will look forward to seeing you on HSN as well as your show.
Thanks fawna
There’s no attachment to the machine. The scanner is built-in to it. 🙂
That’s what I do with rubber stamps.
Can you cut 6mm crafting foam on the Scan-N-Cut? Or just 2mm?
The ScanNCut DX will cut foam up to 3mm.