
Hello everyone! I’m Susan Carol and I’m so thrilled to be here today – thanks for having me, Julie, it’s a real privilege. I’m going to show you how to make your own texture paste. We all love texture and this is a super cheap and easy way to make your own for pennies. I found this recipe on You Tube:
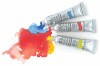
To make the texture paste take 1 part acrylic paint, 1 part talc and ½ part pva glue. I use cheap acrylic paint, usually white, and glue and baby talc which makes the paste smell nice! Put them all together in a jar or tub and stir thoroughly until all mixed together. Add more talc until the paste is the consistency you want or are most comfortable with. I used to measure the amounts but now I just pour them all in. I’ve found the consistency will depend on the type of paint and glue you use and how runny it is. I prefer a thicker consistency so I add more talc. Keep it in an airtight container and it will not go hard.
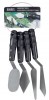
To use the paste with stencils is so much fun and easy too. Take your chosen stencil and place over your project. Blob some texture paste and scrape across the stencil with a palette knife or credit card. If you scrape firmly you will get a thinner layer. If you layer it thickly and lift gently you get a lovely thick design. Wash or thoroughly wipe the stencil right away so the texture paste doesn’t dry on it and wreck it.
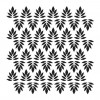
Here are two tags made using Julie’s mini Fleur de Lis which is just about my favourite stencil to use with texture paste:
The first tag has texture paste which has been scraped firmly. The paste was a bit softer and you get a more delicate raised effect:
The second tag is made with thicker texture paste spread generously and the design has come out thicker:
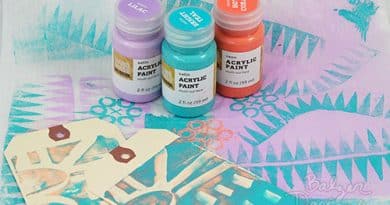
For coloured texture paste you can tint your white texture paste with acrylic paint in any colour. If it becomes too runny simply add a little more talc. Or you can make a fresh batch starting with acrylic paint in the colour you want to use. Here are two bookmarks made using Julie’s Mini Fleur de Lis and Mini Mix and Match Hearts which is simply gorgeous and I love it so much!
I took some white paste and added red to one batch and teal to another, adding a little more talc since the paint I used for this is quite runny. I took the section of the stencil with the four smaller hearts, placed the first heart at the top of the bookmark, masked the other hearts off and spread the red paste. I lifted off the stencil to see how it looked but really I could have left it on and continued masking and adding the texture paste. If you do lift off the stencil each time to have a peek its probably safest to leave it to dry. However, I just couldn’t wait that long and went on adding the hearts by holding and bending the stencil away from the still wet texture pasted hearts. Here is a photo taken at an angle so you can see what a great texture you can get:
The second bookmark is made using Julie’s Mini Fleur de Lis and Mini Layered Circles. I took a medium sized circle and placed it where I wanted the design on the bookmark, then placed the centre of the Fleur de Lis on top and added the blue texture paste. I repeated this in the centre of the bookmark with red and the bottom one in blue. Note that the middle red Fleur de Lis is placed horizontally, whereas the top and bottom designs are vertical:
You can also colour a design made with white texture paste. Leave the texture paste to dry and then paint with a brush or baby wipe. Or use water colours or whatever your preferred medium is. However, I often like to sponge colour while the stencil is still in place. The next project is a masterboard, an A4 sheet of card painted and stamped and then stencilled with Mini Layered Circles which I shall use for cards, bookmarks, scrapbooking:
After stamping I tinted some texture paste blue and added through the Mini Layered Circles then left to dry. Then I took white texture paste and added through the Mini Fleur de Lis onto the blue textured circles. I left the stencil in place and sponged a little paint over the design before removing the stencil – this now gave me a wonderful double layer of texture!
I love the texture on texture effect:
Texture paste can also be heat embossed. Here are some tags which I had decorated with texture paste tinted gold:
But I didn’t like the colour so I embossed them:
To emboss you can either leave the texture paste to dry then replace the stencil and tap Ranger Embossing dabber or Versamark over the textured design, sprinkle with embossing powder and heat set. Or you can cover with embossing powder while the texture paste is still wet. I had fun embossing the tags in different colours:
This one was done using Papermania Tinsel Snowflake embossing powder:
This one has three different colours of embossing powders, added and heat set one at a time:
I’ve also started having fun adding texture to my texture paste! Here it is with sawdust added:
Here it is on a tag used with Aztec:
You can colour it just the same, I used watercolours on these:
See the really cool texture:
Finally, here is an art journal page using most of the techniques above:
I always have both white and black texture paste ready to use so here I’ve used the black with the Fleur de Lis again – I told you I loved it!
Sometimes its cool to scrape just a little paste to get a more distressed look and here I’ve done that with the flowery heart from Mini Mix and Match Hearts:
For the hearts I spread white paste through the larger of the hearts of Mix and Match Hearts on separate card and left to dry:
The hearts were coloured with watercolours then cut out with a flap. I journaled on the backs and then stuck down the flaps only so they can be lifted up to read at any time. I added repositional glue dots so they lie flat on the page. I guess I didn’t need the flaps in the first place!
I LOVE the sawdust heart, it gives such a lovely texture:
When you make your own texture paste and don’t have to spend lots of money on it you can use it with complete abandon! I hope you’ve been inspired to try making your own.
                      |
Hi, I’m Susan Carol and I live in the UK. I love making cards, mini books and scrapbooks. I help run a monthly craft group called Scrap and Yap in Northampton, UK. Art journaling is my new passion, I discovered it just over a year ago and I’m loving it. I’m a Christian so my art journaling is focused on my faith – hence the name of my blog! I have an amazing husband, Dominic and 2 wonderful grown up children, Patrick and Izzy. I would love it if you visited my blog: http://faithwordsfaithexpressions.blogspot.co.uk/
Awesome ideas Susan! I especially like the texture that the sawdust adds.
Awesome ideas Susan! I especially like the texture that the sawdust adds.
Awesome ideas Susan! I especially like the texture that the sawdust adds.
Awesome ideas Susan! I especially like the texture that the sawdust adds.
Awesome ideas Susan! I especially like the texture that the sawdust adds.
Wow, amazing ideas here. Thanks for all of the photos and excellent instruction!
Wow, amazing ideas here. Thanks for all of the photos and excellent instruction!
Wow, amazing ideas here. Thanks for all of the photos and excellent instruction!
Wow, amazing ideas here. Thanks for all of the photos and excellent instruction!
Wow, amazing ideas here. Thanks for all of the photos and excellent instruction!
Great textures, Susan! Your home made texture paste works very well! It produces very crisp and defined results.
Great textures, Susan! Your home made texture paste works very well! It produces very crisp and defined results.
Great textures, Susan! Your home made texture paste works very well! It produces very crisp and defined results.
Great textures, Susan! Your home made texture paste works very well! It produces very crisp and defined results.
Great textures, Susan! Your home made texture paste works very well! It produces very crisp and defined results.
Loved the detailed textures! Fantastic job Susan!
Loved the detailed textures! Fantastic job Susan!
Loved the detailed textures! Fantastic job Susan!
Loved the detailed textures! Fantastic job Susan!
Loved the detailed textures! Fantastic job Susan!
This is a terrific tuturial, Susan. Thanks for sharing your recipe and those drop-dead gorgeous tags. I’m beyond inspired!
This is a terrific tuturial, Susan. Thanks for sharing your recipe and those drop-dead gorgeous tags. I’m beyond inspired!
This is a terrific tuturial, Susan. Thanks for sharing your recipe and those drop-dead gorgeous tags. I’m beyond inspired!
This is a terrific tuturial, Susan. Thanks for sharing your recipe and those drop-dead gorgeous tags. I’m beyond inspired!
This is a terrific tuturial, Susan. Thanks for sharing your recipe and those drop-dead gorgeous tags. I’m beyond inspired!
Love this Your tags are wonderful. I always like finding a way to make my own products. I will definitely use this technique. Thanks!
Love this Your tags are wonderful. I always like finding a way to make my own products. I will definitely use this technique. Thanks!
Love this Your tags are wonderful. I always like finding a way to make my own products. I will definitely use this technique. Thanks!
Love this Your tags are wonderful. I always like finding a way to make my own products. I will definitely use this technique. Thanks!
Love this Your tags are wonderful. I always like finding a way to make my own products. I will definitely use this technique. Thanks!
Thank-you for the inspiration and the recipe for the texture paste. I am looking forward to playing and creating. Loved all the projects you shared.
Thank-you for the inspiration and the recipe for the texture paste. I am looking forward to playing and creating. Loved all the projects you shared.
Thank-you for the inspiration and the recipe for the texture paste. I am looking forward to playing and creating. Loved all the projects you shared.
Thank-you for the inspiration and the recipe for the texture paste. I am looking forward to playing and creating. Loved all the projects you shared.
Thank-you for the inspiration and the recipe for the texture paste. I am looking forward to playing and creating. Loved all the projects you shared.
Oooooohhhhh, I really love this!!!!!! I am gonna have to make some of this and play. Can’t wait. Thanks for showing just how easy it is and how fun it is. hugs, Patty
Oooooohhhhh, I really love this!!!!!! I am gonna have to make some of this and play. Can’t wait. Thanks for showing just how easy it is and how fun it is. hugs, Patty
Oooooohhhhh, I really love this!!!!!! I am gonna have to make some of this and play. Can’t wait. Thanks for showing just how easy it is and how fun it is. hugs, Patty
Oooooohhhhh, I really love this!!!!!! I am gonna have to make some of this and play. Can’t wait. Thanks for showing just how easy it is and how fun it is. hugs, Patty
Oooooohhhhh, I really love this!!!!!! I am gonna have to make some of this and play. Can’t wait. Thanks for showing just how easy it is and how fun it is. hugs, Patty
EXCELLENT!!!!!I l love this post and the examples shown.
EXCELLENT!!!!!I l love this post and the examples shown.
EXCELLENT!!!!!I l love this post and the examples shown.
EXCELLENT!!!!!I l love this post and the examples shown.
EXCELLENT!!!!!I l love this post and the examples shown.
Thank you for saving me gobs of $$! I can’t wait to try mixing my own texture paste now instead of buying it!
Thank you for saving me gobs of $$! I can’t wait to try mixing my own texture paste now instead of buying it!
Thank you for saving me gobs of $$! I can’t wait to try mixing my own texture paste now instead of buying it!
Thank you for saving me gobs of $$! I can’t wait to try mixing my own texture paste now instead of buying it!
Thank you for saving me gobs of $$! I can’t wait to try mixing my own texture paste now instead of buying it!
These are all fantastic! Thank you for sharing this…and your talents.
These are all fantastic! Thank you for sharing this…and your talents.
These are all fantastic! Thank you for sharing this…and your talents.
These are all fantastic! Thank you for sharing this…and your talents.
These are all fantastic! Thank you for sharing this…and your talents.
Susan, you are a crafting maniac! I LOVE, LOVE, LOVE ALL of these projects my friend! I ABSOLUTELY love ALL the tags you did and those bookmarks are stinking FABULOUS!! Of course the journal spread is wonderful too and I love the scripture you came from….something we should keep before us daily! I’m so glad you were able to guest spot here my friend and share your wonderful talents!! Blessings to you! 🙂
Susan, you are a crafting maniac! I LOVE, LOVE, LOVE ALL of these projects my friend! I ABSOLUTELY love ALL the tags you did and those bookmarks are stinking FABULOUS!! Of course the journal spread is wonderful too and I love the scripture you came from….something we should keep before us daily! I’m so glad you were able to guest spot here my friend and share your wonderful talents!! Blessings to you! 🙂
Susan, you are a crafting maniac! I LOVE, LOVE, LOVE ALL of these projects my friend! I ABSOLUTELY love ALL the tags you did and those bookmarks are stinking FABULOUS!! Of course the journal spread is wonderful too and I love the scripture you came from….something we should keep before us daily! I’m so glad you were able to guest spot here my friend and share your wonderful talents!! Blessings to you! 🙂
Susan, you are a crafting maniac! I LOVE, LOVE, LOVE ALL of these projects my friend! I ABSOLUTELY love ALL the tags you did and those bookmarks are stinking FABULOUS!! Of course the journal spread is wonderful too and I love the scripture you came from….something we should keep before us daily! I’m so glad you were able to guest spot here my friend and share your wonderful talents!! Blessings to you! 🙂
Susan, you are a crafting maniac! I LOVE, LOVE, LOVE ALL of these projects my friend! I ABSOLUTELY love ALL the tags you did and those bookmarks are stinking FABULOUS!! Of course the journal spread is wonderful too and I love the scripture you came from….something we should keep before us daily! I’m so glad you were able to guest spot here my friend and share your wonderful talents!! Blessings to you! 🙂
What an amazing post … fabulous suggestions! Can’t wait to try the sawdust … thanks Susan!
What an amazing post … fabulous suggestions! Can’t wait to try the sawdust … thanks Susan!
What an amazing post … fabulous suggestions! Can’t wait to try the sawdust … thanks Susan!
What an amazing post … fabulous suggestions! Can’t wait to try the sawdust … thanks Susan!
What an amazing post … fabulous suggestions! Can’t wait to try the sawdust … thanks Susan!
Do you varnish over you textured creations to set them when people handle them?
Thanks
Wendy
Do you varnish over you textured creations to set them when people handle them?
Thanks
Wendy
Do you varnish over you textured creations to set them when people handle them?
Thanks
Wendy
Do you varnish over you textured creations to set them when people handle them?
Thanks
Wendy
Do you varnish over you textured creations to set them when people handle them?
Thanks
Wendy
Love this. Pennies are short, but I wanted to try texture paste. Now I don’t have to worry about the pennies as I can make lots for next to nothing. Thank you.
Love this. Pennies are short, but I wanted to try texture paste. Now I don’t have to worry about the pennies as I can make lots for next to nothing. Thank you.
Love this. Pennies are short, but I wanted to try texture paste. Now I don’t have to worry about the pennies as I can make lots for next to nothing. Thank you.
Love this. Pennies are short, but I wanted to try texture paste. Now I don’t have to worry about the pennies as I can make lots for next to nothing. Thank you.
Love this. Pennies are short, but I wanted to try texture paste. Now I don’t have to worry about the pennies as I can make lots for next to nothing. Thank you.
Stamped Concrete in India | Stamp Concrete Flooring | Wall Stamping –Concretebydesign
Decorative Stamped Concrete flooring in India, wall Stamping and all Stamped concrete in India are non-porous, impermeable surfaces, which means that weeds can’t grow through it and that stains such as oil can be easily cleaned off.
Click here :- https://www.concretebydesign.in/Decorative-stamp-Concrete