
I'm off to Houston today for Quilt Festival. It's open to the public, so if you're in the area, come and see me in the ScanNCut booth! If you're not in the Houston area, I'll be posting my adventures to instagram!
Did you know that this is an ir-resist-able week for stencil guests? Our second guest this week, Laura, is here with a fantastic tutorial on using gel medium and your stencils to create a resist!
Thanks, Julie, for having me be a guest today! I pretty much fell in love with mixed media and stencils because of the awesome content of this blog.
One of my favorite ways to use stencils is to apply a heavy gel medium to create a resist. I have found that the heavy gel is best because it is super thick and keeps the pattern very well and creates dimension. I usually use spray ink, either sprayed or simply dropped with a dropper.
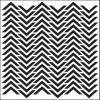
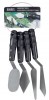
The first step is to lay your paper down on your splat mat. I use a good watercolor paper because it will be getting very wet and other paper will warp terribly or not hold up. Lay your stencil down (I used Chevron) over your paper. I use magnetic boards by Basic Grey and use the magnets to hold down my stencil. They are strong enough and I’m not going through endless rolls of tape. If I want to mask off a section, then I use tape. You do need to work around the magnets, so if you are new to handling stencils, you might want to go ahead and use tape. Apply your gel medium with a palette knife, covering either the entire stencil or just a random section; I chose a random section.
Allow to dry. I like to place mine in my oven set at warm, just when you hear it click on. If yours does not have a setting lower than 170º F, just prop the door open a little so you don’t scorch your project. Not only does it greatly speed up drying time, it flattens out the paper, and since I live in the rainy Pacific Northwest, speeding up drying time is a big bonus.
Next I chose some spray inks that were earthy to go with the photos I had printed off. Sometimes I spray; sometimes I use a dropper to drop the ink. A dropper is an excellent option for a watery effect, but I wanted to go with earthy, so I sprayed, allowing the overspray to create a cool mossy sort of effect.
Spray, add water, let the ink drip, spray some more, add a new color, let drip, repeat until you achieve the desired effect.
Adding sprays of water washes the ink off of the stencil design so it pops through. I often pick up used ink, from my splat mat, with my dropper to add back over the page. Waste not, want not! Back into the oven it goes to dry.
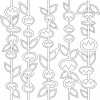
As well as trying heavy gel medium, try some glass bead gel. The texture is fabulous and it interacts with the ink in cool ways. The Stick Flowers stencil made for one of my all time favorite backgrounds and the bead gel was the perfect medium to use.
Think about the overall effect you want to achieve when choosing your stencil. I used this one for a couple of photos taken on a rainy day and the stencil design lent to a very watery feel as the ink wavered on its way down the Diamonds design.
You can also wipe down the gelled parts and color with a second ink color. I used the Pomegranate stencil with a blue “water” background and painted with a green ink because the design reminded me of lily pads and that fit my photos perfectly.
Supplies used:
             |
Hello, my name is Laura Mooney and I call Eugene, OR home. I’ve been scrapping and crafting for over 20 years. I found mixed media about 2 years ago and I haven’t looked back. I love mixed media! I owe my love of all things mixed media to stumbling upon Julie’s blog and trying out new techniques she showcased. I also love photography and scrapping is my main mixed media outlet.
You can visit me at my blog http://happinessequalscreation.blogspot.com/
I really love this Laura. Loving the technique and also your pages created from it. Things like this make me want to try again with scrapbooking!
Might have to try those sprays too – loving the colours you used.
I really love this Laura. Loving the technique and also your pages created from it. Things like this make me want to try again with scrapbooking!
Might have to try those sprays too – loving the colours you used.
I really love this Laura. Loving the technique and also your pages created from it. Things like this make me want to try again with scrapbooking!
Might have to try those sprays too – loving the colours you used.
I really love this Laura. Loving the technique and also your pages created from it. Things like this make me want to try again with scrapbooking!
Might have to try those sprays too – loving the colours you used.
I really love this Laura. Loving the technique and also your pages created from it. Things like this make me want to try again with scrapbooking!
Might have to try those sprays too – loving the colours you used.
Love your resist technique. I’ll have to try the heavy gel medium.
Love your resist technique. I’ll have to try the heavy gel medium.
Love your resist technique. I’ll have to try the heavy gel medium.
Love your resist technique. I’ll have to try the heavy gel medium.
Love your resist technique. I’ll have to try the heavy gel medium.
Calm or the lily pads LO is my fav and the directions you gave were simple to follow. Thanks Laura.
Calm or the lily pads LO is my fav and the directions you gave were simple to follow. Thanks Laura.
Calm or the lily pads LO is my fav and the directions you gave were simple to follow. Thanks Laura.
Calm or the lily pads LO is my fav and the directions you gave were simple to follow. Thanks Laura.
Calm or the lily pads LO is my fav and the directions you gave were simple to follow. Thanks Laura.
Gorgeous, Laura! Your technique is super effective and adds such punch! Thanks for sharing!
Gorgeous, Laura! Your technique is super effective and adds such punch! Thanks for sharing!
Gorgeous, Laura! Your technique is super effective and adds such punch! Thanks for sharing!
Gorgeous, Laura! Your technique is super effective and adds such punch! Thanks for sharing!
Gorgeous, Laura! Your technique is super effective and adds such punch! Thanks for sharing!
Wow, Laura! These are amazing and beautiful! I enjoyed reading your process and admire your ability to create like this. Incredible!
Wow, Laura! These are amazing and beautiful! I enjoyed reading your process and admire your ability to create like this. Incredible!
Wow, Laura! These are amazing and beautiful! I enjoyed reading your process and admire your ability to create like this. Incredible!
Wow, Laura! These are amazing and beautiful! I enjoyed reading your process and admire your ability to create like this. Incredible!
Wow, Laura! These are amazing and beautiful! I enjoyed reading your process and admire your ability to create like this. Incredible!
Gorgeous! What a fun way to add some texture. 🙂
Gorgeous! What a fun way to add some texture. 🙂
Gorgeous! What a fun way to add some texture. 🙂
Gorgeous! What a fun way to add some texture. 🙂
Gorgeous! What a fun way to add some texture. 🙂
Amazing! You are one talented lady! Thanks for the inspiration Laura!
Amazing! You are one talented lady! Thanks for the inspiration Laura!
Amazing! You are one talented lady! Thanks for the inspiration Laura!
Amazing! You are one talented lady! Thanks for the inspiration Laura!
Amazing! You are one talented lady! Thanks for the inspiration Laura!
I love that you used this technique for scrapbook pages. The gel/ink adds to the photos so much. Thank you for the tutorial.
I love that you used this technique for scrapbook pages. The gel/ink adds to the photos so much. Thank you for the tutorial.
I love that you used this technique for scrapbook pages. The gel/ink adds to the photos so much. Thank you for the tutorial.
I love that you used this technique for scrapbook pages. The gel/ink adds to the photos so much. Thank you for the tutorial.
I love that you used this technique for scrapbook pages. The gel/ink adds to the photos so much. Thank you for the tutorial.
Very inspiring Laura!
Very inspiring Laura!
Very inspiring Laura!
Very inspiring Laura!
Very inspiring Laura!
Great tute, Laura. And thank you for showing that BG magnetic board – I have one I haven’t used in ages and it’s perfect for this!
Great tute, Laura. And thank you for showing that BG magnetic board – I have one I haven’t used in ages and it’s perfect for this!
Great tute, Laura. And thank you for showing that BG magnetic board – I have one I haven’t used in ages and it’s perfect for this!
Great tute, Laura. And thank you for showing that BG magnetic board – I have one I haven’t used in ages and it’s perfect for this!
Great tute, Laura. And thank you for showing that BG magnetic board – I have one I haven’t used in ages and it’s perfect for this!